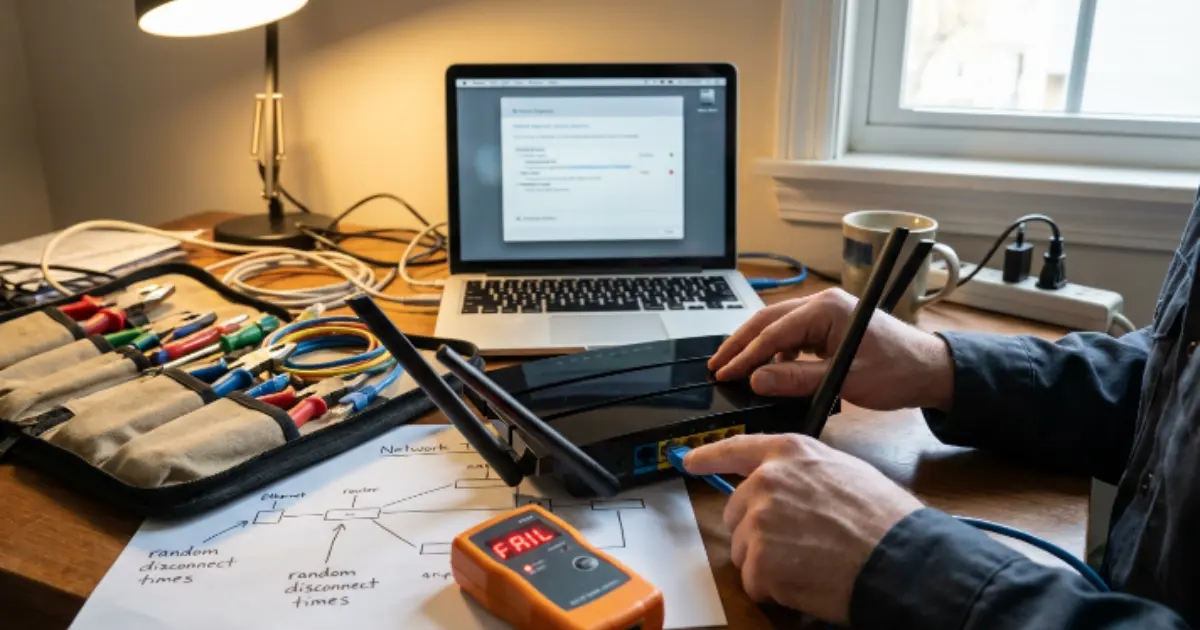
Your internet drops for ten seconds, maybe thirty, then comes back on its own. By the time you open Command Prompt and run a test, everything looks perfectly normal. The connection is stable, the ping replies are clean, and there is zero evidence that anything went wrong. This cycle repeats for days or weeks — and when you finally call your ISP, they see no issue on their end because the drop is never happening during the call.
This is the exact scenario where WinMTR becomes the most valuable tool a home user can run on Windows 11. Unlike one-shot diagnostic commands, WinMTR monitors every hop between your PC and a target server continuously — for minutes, hours, or even an entire day — logging every packet lost and every latency spike along the way. When the drop eventually happens again, WinMTR will have already recorded exactly where it occurred, which hop failed, and how severe it was.
This guide walks you through how to use WinMTR to catch random internet drops on Windows 11, how to read the results even if you have no networking background, and how to turn those results into evidence your ISP cannot dismiss.
Why Ping and Tracert Cannot Catch Random Internet Drops
What Makes Intermittent Drops Impossible to Diagnose With Basic Tools
The core problem with random internet disconnects is timing. A standard ping command sends ICMP echo requests to a single destination and reports whether replies come back. If your connection is stable at the moment you run the test, ping will return clean results every time. It tells you the state of the connection right now — not what happened five minutes ago when your video call froze.
Tracert has a similar limitation. It maps the route from your PC to a destination and measures the response time at each hop once. You can read tracert results to identify a slow or unresponsive hop, but only if the problem is occurring during that exact moment. If the route is clean when you run the command, tracert will show a perfectly healthy path. A drop that happens once every two hours will almost never be visible in a single tracert snapshot.
Neither tool is designed to sit and watch. Neither tool accumulates data over time. And neither tool can tell you that hop number four dropped fifteen percent of packets between 2:00 AM and 4:00 AM while you were asleep.
What WinMTR Does That Ping and Tracert Cannot
WinMTR combines the functionality of both ping and tracert into a single continuous test. It traces the full route to your target — every router hop in between — and then keeps pinging every single hop repeatedly, indefinitely, until you press stop. Each hop accumulates its own statistics: total packets sent, packets lost, loss percentage, best response time, worst response time, and average response time.
This means WinMTR does not just capture a snapshot. It builds a statistical profile of your entire connection path over whatever duration you choose. If a drop occurs at 3:47 AM at the third hop, that loss is permanently recorded in the running totals. When you check the results the next morning, you will see exactly which hop started losing packets and whether the hops after it were also affected.
This is the fundamental difference. Ping and tracert answer the question “is my connection working right now?” WinMTR answers the question “has my connection been stable over the last six hours, and if not, where exactly did it fail?” For diagnosing random internet disconnects on Windows 11, that distinction changes everything.

What WinMTR Is and How It Works for Home Users
WinMTR is a free, open-source network diagnostic tool that runs on Windows. It performs a combination of route tracing and continuous pinging in a single window. Once you start a test, WinMTR discovers every router between your computer and the target IP address, then sends repeated packets to each of those routers simultaneously. The results update in real time inside a simple table — no command line required, no log files to dig through, and no technical setup.
For home users dealing with random internet drops on Windows 11, this is significant because the tool requires zero networking knowledge to operate. You type an address, click start, and leave it running. The data it collects over time is what makes it powerful.
WinMTR vs Ping vs Tracert — What Each Tool Shows
Each of these three tools serves a different diagnostic purpose, and understanding the distinction prevents wasted effort.
Ping sends ICMP packets to a single target and reports whether each packet received a reply. It measures round-trip time but only tests the final destination. It cannot tell you which hop along the path is causing trouble.
Tracert traces the route from your PC to a destination by sending packets with incrementing TTL values. Each router along the path responds, revealing the full route. However, tracert runs once and exits. It does not accumulate loss or latency data over time.
WinMTR does both — simultaneously and continuously. It maps the route like tracert, then pings every hop like ping, and keeps doing it until you manually stop the test. Every hop builds its own running statistics for packet loss and latency, which means intermittent problems that only appear once every hour still get captured in the data.
Why WinMTR Is the Best Tool for Catching Random Drops
The reason WinMTR is ideal for catching intermittent internet problems comes down to persistence. A random drop might last ten seconds out of every three hours. If you run ping for two minutes and nothing happens, you learn nothing. If you run WinMTR for six hours, those ten seconds of failure are recorded permanently in the hop-by-hop statistics.
More importantly, WinMTR does not just tell you that a drop happened — it tells you where. If your router is fine, your modem is fine, but hop three in your ISP’s network shows five percent packet loss while every hop before it shows zero, you now have a clear, specific location for the fault. That level of detail is what separates a vague complaint to your ISP from a documented, undeniable technical report.
Is WinMTR Safe to Use on a Home Network
WinMTR is completely safe. It does not modify any network settings, it does not install drivers, and it does not require administrator privileges to run in most configurations. The packets it sends are standard ICMP echo requests — the same type of packets that ping and tracert use. No firewall rules need to be changed, and no ports need to be opened.
The tool is also extremely lightweight. It uses minimal CPU and memory, which means you can leave it running in the background for hours without any noticeable impact on your system performance or internet speed. It will not interfere with gaming, streaming, video calls, or any other activity running alongside it.
How to Download and Set Up WinMTR on Windows 11
Getting WinMTR ready on a Windows 11 machine takes less than two minutes. There is no installer to run, no configuration wizard, and no account to create. The entire tool is a single executable file inside a zip archive. Once extracted, it is ready to use immediately.
Where to Download WinMTR — No Installation Required
The official download source is winmtr.net. The website hosts the latest stable release as a direct zip download. There is no third-party download manager, no bundled software, and no ads to navigate through.
Once you download the zip file, right-click it and select Extract All in Windows 11. Inside the extracted folder, you will find two subfolders — one for the 32-bit version and one for the 64-bit version. Each subfolder contains a single file: WinMTR.exe. That file is the entire application. You can move it to your desktop, your Documents folder, or anywhere convenient. Double-click it, and the tool opens immediately.
Because WinMTR is a portable application, it does not write anything to your registry and does not place files in your system directories. This also means you can run it from a USB drive on any Windows machine without leaving any trace behind.
32-bit vs 64-bit — Which Version to Choose
Almost every modern Windows 11 system runs a 64-bit operating system. If you purchased or built your PC within the last several years, the 64-bit version of WinMTR is the correct choice.
To verify, open Settings → System → About on your Windows 11 machine. Under Device specifications, look at the line labeled System type. If it says “64-bit operating system, x64-based processor,” use the 64-bit WinMTR executable. If it says “32-bit operating system,” use the 32-bit version instead.
Choosing the wrong version will not damage anything — the application simply will not launch, or Windows will display a compatibility error. If WinMTR fails to open after double-clicking, checking this setting is the first thing to verify.
Common WinMTR Error on Windows 11 and How to Fix It
The most common issue users encounter on Windows 11 is a Windows Defender SmartScreen warning that appears when launching WinMTR for the first time. Because the executable is downloaded from the internet and is not signed by a major publisher, SmartScreen may flag it as an unrecognized application.
This does not mean the file is dangerous. To proceed, click More info on the SmartScreen popup, then click Run anyway. The application will open normally and will not trigger the warning again on subsequent launches.
A less common issue is WinMTR failing to send packets because a third-party firewall or antivirus is blocking outbound ICMP traffic. If the tool opens but every hop shows “No response,” check your firewall settings and ensure that ICMP echo requests are not being silently blocked. Windows Firewall in its default configuration allows ICMP outbound traffic, so this issue typically only appears with third-party security software.
If you see a request timed out error at every single hop despite having a working internet connection, ICMP blocking is almost certainly the cause.
How to Run WinMTR to Monitor Your Connection
With WinMTR extracted and open on your Windows 11 desktop, running a test is straightforward. The interface has a single text field labeled Host, a Start button, and a Stop button. The only decision you need to make before clicking Start is what target address to use — and that choice matters more than most users realize.
Which IP Address to Use as the Target
The target you enter determines the full route WinMTR will trace and monitor. For diagnosing random internet drops, you want a target that is always online, responds to ICMP reliably, and is far enough away from your network to reveal every ISP hop in between.
The best general-purpose targets are public DNS servers. 1.1.1.1 from Cloudflare and 8.8.8.8 from Google are both excellent choices. These servers have near-perfect uptime, respond to ping requests consistently, and are routed through major internet backbones — meaning the trace will pass through multiple hops inside your ISP’s network before reaching the destination.
Avoid using a website domain name like google.com as the target. While WinMTR can resolve domain names, some web servers block or rate-limit ICMP traffic, which can create artificial packet loss at the final hop that has nothing to do with your connection quality. Using a raw IP address eliminates this variable entirely.
How Long to Run WinMTR to Catch Intermittent Drops
The entire point of using WinMTR is to catch drops that happen unpredictably. If your internet disconnects once every few hours, a five-minute test is unlikely to capture anything. As a baseline, let WinMTR run for a minimum of two to four hours. If your drops are especially rare — once a day, for example — leave it running overnight or for a full twenty-four-hour cycle.
WinMTR does not have a built-in timer or auto-stop feature. It will continue running until you manually click Stop. The longer it runs, the more statistically meaningful the loss and latency numbers become. A single lost packet out of fifty might be noise. Twenty lost packets out of five thousand concentrated at the same hop is a pattern.
How to Run WinMTR in the Background While Using Your PC
WinMTR does not need to stay in the foreground to continue collecting data. Once you click Start, you can minimize the window and use your PC normally — browse, stream, game, or work. The tool continues sending and receiving packets in the background without interruption.
The only precaution is to avoid accidentally closing the WinMTR window. If you close it before stopping and exporting, all accumulated data is lost permanently. Keep it minimized to the taskbar rather than closing it, and avoid running system cleaners or task killers that might terminate background processes while your test is active.
How to Read WinMTR Results Line by Line — For Home Users
After WinMTR has been running for several hours, the results table will contain a complete statistical picture of every hop between your PC and the target server. Each row represents one router along the path, and each column shows a different performance metric. Reading this table correctly is the difference between understanding your problem and misinterpreting normal network behavior as a fault.
What Each Column in WinMTR Means in Plain Language
WinMTR displays the following columns for every hop:
- Hostname — The DNS name or IP address of the router at that hop. Some routers do not have a reverse DNS entry, so you may see a raw IP address instead of a readable name.
- Nr — The hop number, starting from 1. Hop 1 is typically your home router. The last hop is the target server.
- Loss % — The percentage of packets that were sent to that hop and never received a reply.
- Sent — The total number of packets sent to that hop since the test started.
- Recv — The total number of packets that hop actually responded to.
- Best — The lowest round-trip time recorded for that hop, measured in milliseconds.
- Avg — The average round-trip time across all responses from that hop.
- Worst — The highest round-trip time recorded for that hop.
- Last — The round-trip time of the most recent packet.
Each hop’s TTL value determines its position in the route. Hop 1 is closest to you, and hop numbers increase as packets travel further toward the destination.
What the Loss Percentage Column Actually Means
The Loss % column is the most important number in the entire table. It tells you what fraction of packets never received a reply from that specific hop. A hop showing zero percent loss means every single packet was answered. A hop showing five percent loss means one out of every twenty packets disappeared.
For a home user trying to diagnose random internet disconnects on Windows 11, this is the column that will reveal the problem. If a hop inside your ISP’s network shows consistent loss while your home router shows zero, the fault is between those two points — and it is not something you can fix from your end.
What the Avg and Worst Columns Tell You About Latency
The Avg column shows the typical response time from each hop across the entire test duration. Under normal conditions, early hops will have low averages — often under five milliseconds — and later hops will show gradually higher values as packets travel further.
The Worst column reveals latency spikes. If a hop shows an average of twenty milliseconds but a worst of nine hundred milliseconds, that hop experienced at least one severe delay during the test. When this pattern appears at the same hop that also shows packet loss, it strongly suggests congestion or instability at that specific point in the route.
What No Response at a Hop Means — When to Ignore It
It is common for one or more hops in a WinMTR trace to show one hundred percent loss and display “No response” in the hostname column. This looks alarming but is usually harmless.
Many ISP and backbone routers are configured to deprioritize or completely ignore ICMP packets. These routers still forward your actual internet traffic normally — they simply refuse to reply to diagnostic pings. The key indicator is what happens at the hops after the silent one. If the next hop and the final destination both show zero loss, the “No response” hop is not dropping your traffic. It is just not answering WinMTR’s probes.
Only treat a non-responding hop as a problem if every hop after it also shows loss. That pattern means traffic is genuinely being dropped at that point, not just silently forwarded.

How to Find Exactly Where the Drop Is Happening
The real diagnostic power of WinMTR lies in pattern recognition. Once you have collected several hours of data, the loss percentage column will reveal one of a few distinct patterns. Each pattern points to a different part of the network, and knowing which pattern you are looking at determines whether the problem is yours to fix or your ISP’s to resolve.
Pattern 1 — Loss Only at First Hop — Home Network Problem
If hop 1 — your home router — shows packet loss while all subsequent hops are clean, the issue is inside your own network. This typically means the connection between your PC and your router is unreliable. Common causes include a weak Wi-Fi signal, a damaged Ethernet cable, an overheating router, or a router that is running outdated firmware.
In this scenario, the problem never reaches your ISP’s network. Switching from Wi-Fi to a wired connection, restarting the router, or relocating closer to the access point are the first steps to test. If hop 1 loss disappears after connecting via Ethernet, Wi-Fi instability was the cause.
Pattern 2 — Loss Starts at Hop 2 or 3 — Modem or ISP Problem
Hop 2 is usually the first device beyond your home router — often your modem or your ISP’s first gateway. If hop 1 shows zero loss but loss begins appearing at hop 2 or hop 3 and continues through every hop after that, the problem is occurring at the boundary between your home network and your ISP’s infrastructure.
This pattern frequently indicates a modem issue — a degraded coaxial signal, a failing modem, or a provisioning problem on the ISP’s side. If you own your modem, power cycling it or checking the signal levels through its admin page can sometimes help. If the modem is ISP-provided, this pattern gives you strong grounds to request a technician visit or a modem replacement.
Pattern 3 — Loss Starts Mid-Route and Continues — ISP Network Problem
This is the pattern that proves your ISP is causing random drops. Hops 1 through 4 might show zero loss, then hop 5 suddenly shows three to ten percent loss, and every hop from 5 onward — including the final destination — mirrors that same loss.
When loss begins at a mid-route hop and carries through to the end, it means packets are being dropped at that specific router inside your ISP’s backbone or at a peering point between networks. There is nothing you can adjust at home to fix this. The fault is entirely within infrastructure you have no control over, and this is exactly the evidence you need when contacting your ISP.
Pattern 4 — Loss Only at Final Destination — Server Problem
If every hop along the route shows zero loss except the very last one — the target server itself — the problem is not your connection. The destination server is either rate-limiting ICMP responses, experiencing its own congestion, or partially blocking ping traffic.
This pattern means your internet connection is actually healthy. Your ISP’s network is clean, your home network is clean, and the only failure point is the remote server. If you are experiencing actual connectivity issues with a specific website or service despite this result, the issue may be DNS-related rather than routing-related. In such cases, slow DNS resolution from your ISP can cause symptoms that look like drops but are actually lookup delays.
What False Positive Loss Looks Like — How to Spot It
Not all packet loss in a WinMTR trace represents a real problem. The most common false positive occurs when a single hop in the middle of the route shows loss, but the hop immediately after it — and the final destination — both show zero loss.
This happens because many transit routers deprioritize ICMP packets. They forward your actual traffic at full speed but drop or delay diagnostic pings when under load. If traffic is not actually being lost (proven by clean results at subsequent hops), the loss at that single hop is cosmetic and can be safely ignored.
The rule is simple: real packet loss carries forward. If hop 6 shows loss but hops 7 through 12 are clean, hop 6 is a false positive. If hop 6 shows loss and hops 7 through 12 all show similar or increasing loss, hop 6 is where the actual problem begins.
How to Export WinMTR Results as Evidence for Your ISP
Running WinMTR and reading the results yourself is only half the process. If the data confirms that packet loss originates inside your ISP’s network, you need to export and present that data in a format your ISP’s support team can act on.
How to Export WinMTR as Text Report
Once your test has collected enough data — ideally several hours at minimum — click Stop in the WinMTR window. Then click Export TEXT. WinMTR will generate a plain text file containing the full hop-by-hop table with all columns: hostname, loss percentage, sent, received, best, average, and worst latency for every hop.
Save this file with a descriptive name that includes the date and time range of the test, such as winmtr-report-june15-overnight.txt. If you ran multiple sessions across different times of day, export each one separately. Multiple reports showing the same hop failing repeatedly carry significantly more weight than a single test.
What Information Your ISP Needs to Take Your Report Seriously
A raw WinMTR export alone may not be enough to escalate your case past the first level of support. To make your report actionable, include the following alongside the text file:
- Date and time range of the test, including your time zone.
- Target IP address used — confirm it was a reliable public server like 1.1.1.1 or 8.8.8.8.
- Connection type — specify whether your PC was connected via Ethernet or Wi-Fi during the test.
- Hop number where loss begins — point out the exact hop and note that all hops before it are clean.
- Your modem and router model, especially if the equipment is ISP-provided.
This package gives the support team everything they need to identify the failing node internally without asking you to reboot your router and call back — the standard script that wastes everyone’s time.
What to Say When You Call Your ISP With WinMTR Evidence
When contacting support, lead with specifics rather than symptoms. Instead of saying “my internet keeps dropping,” say something like: “I have run a continuous network trace for twelve hours using WinMTR. Hops one through three on my end show zero packet loss. Starting at hop four, which resolves to an IP within your network, I am seeing consistent six percent packet loss that carries through to the final destination. I have the full report exported and can email it to your escalation team.”
This kind of statement immediately signals that you have done real diagnostics and bypasses the basic troubleshooting script. Ask specifically for the report to be forwarded to their network operations team. If the first representative cannot accept the file, request a supervisor or a ticket number so you can email the evidence directly.
What to Do If WinMTR Confirms the Problem Is in Your Home Network
If the loss appears at hop 1 or if all hops beyond your router are clean while you are still experiencing drops, the issue is within your own equipment or local setup. Start by switching from Wi-Fi to a direct Ethernet connection and rerunning the test. Wi-Fi interference, congested channels, and weak signal strength are the most frequent causes of locally generated packet loss.
If loss persists over Ethernet, the problem may be your router or modem hardware itself. Reboot both devices by unplugging them for thirty seconds. If the issue continues after a reboot, try bypassing the router entirely by connecting your PC directly to the modem. A clean WinMTR result in that configuration confirms the router is the failing device.
For situations where your PC cannot reach the gateway at all, a destination host unreachable error usually points to a misconfigured network adapter, a dead cable, or a DHCP failure — all solvable on your end without involving your ISP. For a broader understanding of how home internet connections work and where failures can occur, the internet connectivity explained guide covers the full picture.
Frequently Asked Questions
What is WinMTR and how does it work?
WinMTR is a free Windows tool that combines route tracing and continuous pinging into a single test. It discovers every router hop between your PC and a target server, then sends repeated ICMP packets to each hop simultaneously. The results accumulate over time, showing packet loss and latency statistics for every point along the route.
How do I use WinMTR on Windows 11?
Download the zip file from the official website, extract it, and run the WinMTR.exe file — no installation is needed. Type a target IP address such as 1.1.1.1 or 8.8.8.8 into the Host field and click Start. Let it run for several hours to capture intermittent issues, then click Stop and review or export the results.
How is WinMTR different from ping and tracert?
Ping tests only the final destination and runs once. Tracert maps the route but does not monitor it continuously. WinMTR does both simultaneously and keeps running indefinitely, building statistical data for every hop. This makes it the only tool among the three capable of catching problems that happen unpredictably.
What does the Loss% column mean in WinMTR?
Loss% shows the percentage of packets sent to a specific hop that never received a reply. Zero percent means every packet was answered. Any value above zero at a hop — when subsequent hops also show loss — indicates that router is dropping traffic.
Why does WinMTR show packet loss at every hop?
If every hop from the first to the last shows similar loss, the problem usually originates early in the path — often at hop 1 or hop 2. Loss at an early hop cascades through all remaining hops because packets that are dropped early never reach the later routers at all.
How do I know if WinMTR packet loss is a real problem or a false positive?
Check whether the loss carries forward. If a single mid-route hop shows loss but all hops after it — including the final destination — show zero loss, that hop is simply deprioritizing ICMP responses and your actual traffic is unaffected. Real loss always continues from the failing hop through to the end.
What IP address should I use as the WinMTR target?
Use a public DNS server IP such as 1.1.1.1 or 8.8.8.8. These servers are always online, respond reliably to ICMP, and route through enough ISP hops to give a complete picture of your connection path. Avoid using website domain names, as some web servers block ping traffic.
How do I prove to my ISP that the problem is on their side?
Run WinMTR for at least four to six hours targeting a public DNS IP. Export the results as a text report. Identify the first hop that shows loss and confirm it falls within your ISP’s network — not your home equipment. Present the report with the date, time range, connection type, and the specific hop number where loss begins. Request that the report be forwarded to the network operations team for investigation.