
You open Command Prompt, type ping 8.8.8.8, and instead of the expected reply, Windows throws back a frustrating response: “Ping: transmit failed. General failure.” No packet loss stats, no timeout — just a dead end. This error is one of the most misleading network issues on Windows 11 and Windows 10 because your internet browser might work perfectly fine while ping refuses to function. The vague wording makes it even harder to diagnose without knowing where to look.
This guide breaks down what this transmit failure means, why it occurs, and provides nine targeted fixes — covering everything from firewall rules and IPv6 conflicts to VMware network issues and post-update failures. Every solution includes diagnostic reasoning so you understand why a fix works, not just what buttons to click.
What Does “Ping Transmit Failed General Failure” Actually Mean?
When you run a ping command, Windows sends small ICMP (Internet Control Message Protocol) echo request packets to a target IP address or hostname. The target then sends an echo reply back, confirming network connectivity. The “transmit failed – general failure” message means Windows could not even send the ICMP packet out from your machine. The packet never left your computer.
This distinction is critical. A “Request timed out” message means the packet was sent but no reply came back — a remote-side or routing issue. But “General Failure” means the local network stack itself rejected or failed to transmit the packet. The problem is entirely on your end, inside your operating system’s networking layers. Windows uses this generic label because multiple internal components — the TCP/IP stack, firewall engine, network adapter driver, or IP configuration — can block outbound ICMP transmission, and the OS doesn’t specify which one failed.If Windows instead generates a routing-layer response such as a destination host unreachable error, it indicates that the packet successfully left the local stack but no valid route to the target exists in the routing table — a fundamentally different category of network failure.
Understanding this ping general failure meaning saves significant troubleshooting time. You won’t waste effort checking remote servers or calling your ISP first. Instead, you focus inward: your machine’s network configuration, adapter health, and security software.
If your ping command returns a “Destination Host Unreachable” message instead of a normal reply, the issue usually involves routing or gateway connectivity on your local network. See our detailed guide on destination host unreachable to understand the causes and fixes.
If the failure occurs at the very first network hop — your router — the issue may involve the local gateway itself. See our guide on cannot ping default gateway to diagnose gateway-level connectivity problems.
However, if the packet does leave your system but the reply appears from a different IP address than the one you targeted, the issue is usually related to routing or ARP conflicts. See our guide on ping reply from different IP address.
Why Does This Error Happen? (Most Common Causes)
The “general failure” label is deliberately vague, but in practice, the root cause almost always falls into one of four categories. Identifying which category applies to your situation cuts the troubleshooting process dramatically.
Firewall or Antivirus Blocking ICMP Packets
Windows Defender Firewall and third-party security software (Norton, Kaspersky, Bitdefender, etc.) can silently block outbound ICMP echo requests. Many firewall profiles — especially “Public” network profiles — block ICMP by default. If your network profile recently switched from Private to Public (which happens automatically when connecting to new networks), ping may suddenly stop working even though browsing remains unaffected. Third-party antivirus suites with built-in firewalls are particularly aggressive about this.
Corrupted TCP/IP Stack or Wrong Network Settings
Windows maintains an internal TCP/IP stack that manages all network communication. Over time — through failed updates, software installations, VPN clients, or improper shutdowns — this stack can become corrupted. When the stack is damaged, certain packet types (particularly ICMP) fail to transmit even though TCP and UDP traffic for web browsing might still function through alternative code paths. Stale DNS cache entries or incorrect IP assignments compound the problem.
IPv6 Conflict or Disabled IPv6 Issues
This is the single most common cause of the ping transmit failed general failure error on Windows 11. When you type ping hostname without specifying a protocol, Windows may default to IPv6 resolution. If your network adapter has IPv6 enabled but your router or ISP does not properly support it, the ping command attempts to send an IPv6 ICMP packet through a non-functional IPv6 path — and fails immediately. Conversely, some registry tweaks or third-party tools disable IPv6 in ways that leave the stack in a broken half-state, triggering the same error.
Network Adapter Driver Problems (Windows 11/10)
Outdated, corrupted, or incompatible network adapter drivers directly cause ping general failure on Windows 11 and Windows 10. This is especially common after major feature updates (like upgrading from 23H2 to 24H2), where Microsoft’s generic driver replaces the manufacturer’s optimized driver. Virtual network adapters installed by VPN clients, VMware, or Hyper-V can also conflict with the primary physical adapter, intercepting and dropping ICMP packets before they reach the hardware.
Quick Checks Before Fixing
Before applying any fix, spend two minutes running basic diagnostic pings. These quick tests narrow down whether the problem is local, network-wide, or protocol-specific — saving you from applying unnecessary changes to your system.
Run Ping on Different Targets (Local IP, Router, 8.8.8.8)
Open Command Prompt as Administrator and run three separate ping tests in this exact order:
- Ping your own machine (loopback):
ping 127.0.0.1— This tests whether your TCP/IP stack is functional at the This tests whether your TCP/IP stack is functioning at the most basic level. If even this returns “General Failure,” it indicates a serious local networking issue — such as a corrupted TCP/IP stack, a broken Winsock configuration, a disabled or malfunctioning network adapter, or driver-level failure. In this case, skip basic troubleshooting and move directly to the Network Reset Commands section to rebuild the networking components properly. - Ping your default gateway (router):
ping 192.168.1.1(replace with your actual gateway IP) — If loopback works but this fails, the issue sits between your adapter and the router. Driver problems, firewall rules, or adapter misconfigurations are the likely culprits. - Ping an external IP:
ping 8.8.8.8— If both loopback and gateway succeed but this fails, your router or ISP may be blocking ICMP traffic beyond the local network. - Ping with forced IPv4:
ping -4 google.com— Ifping google.comgives “General Failure” butping -4 google.comworks perfectly, the problem is an IPv6 conflict, which is extremely common on Windows 11.
Document which tests pass and which fail. This pattern tells you exactly which fix category to prioritize.
Check IP Configuration (ipconfig /all in CMD)
Run ipconfig /all in the same elevated Command Prompt window. Look for these specific red flags:
- No Default Gateway listed — Your adapter has no route to the network. Reconnect Wi-Fi or reseat your Ethernet cable.
- APIPA address (169.254.x.x) — Your machine failed to get an IP from DHCP. The router is unreachable or DHCP is malfunctioning.
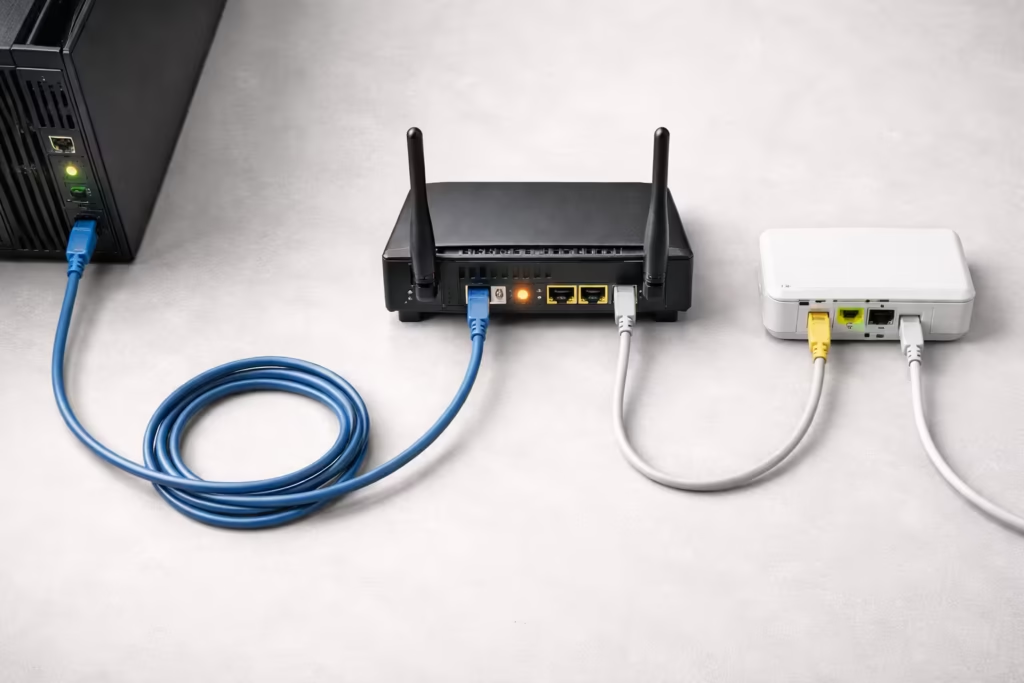
- Multiple active adapters — VPN adapters, VMware virtual NICs, or Hyper-V virtual switches appearing alongside your real adapter can confuse Windows routing and cause ping transmit failed errors on the wrong interface.
- IPv6 address present but gateway missing — IPv6 is partially configured, which directly triggers the general failure when ping defaults to IPv6.
Firewall and Security Fixes (Fastest Solutions)
Firewall and antivirus interference accounts for a large percentage of ping general failure cases, especially on fresh Windows installations or after security software updates. These fixes take under five minutes and should be tested early.
Allow ICMP Echo Requests in Windows Firewall (Inbound Rules)
Windows Firewall can block ICMP packets on both inbound and outbound directions. To allow ping through, follow these steps:
- Press Win + R, type
wf.msc, and press Enter to open Windows Defender Firewall with Advanced Security. - Click Inbound Rules in the left panel.
- Look for rules named “File and Printer Sharing (Echo Request – ICMPv4-In)”. There will be multiple entries — one for Domain, Private, and Public profiles.
- Right-click each entry and select Enable Rule for the profiles matching your current network type.
- If you also need IPv6 ping, enable the corresponding ICMPv6-In rules as well.
For outbound ICMP (which is less commonly blocked but still possible), click Outbound Rules and verify no custom rule is explicitly blocking ICMP protocol traffic. Corporate group policies or third-party security tools sometimes inject outbound deny rules that silently kill ping without affecting browser traffic.
After enabling these rules, test immediately with ping 8.8.8.8 in Command Prompt.
Temporarily Disable Antivirus/Firewall and Test
If modifying firewall rules didn’t help, your third-party antivirus may have its own independent firewall engine that overrides Windows Defender. Norton, Kaspersky, ESET, and Bitdefender all maintain separate packet filtering layers.
Temporarily disable your antivirus software’s firewall component (not just real-time protection — specifically the firewall or network shield module). Then immediately run ping 8.8.8.8 again. If ping suddenly works, the antivirus firewall is confirmed as the cause. Add an ICMP exception within that software’s settings rather than leaving it permanently disabled. Each antivirus suite handles this differently, so consult the vendor’s official support documentation for ICMP exception steps specific to your product and version.
IPv6 Related Fixes (Common Cause on Windows 11/10)
IPv6-related conflicts are the most frequently reported trigger for the ping transmit failed general failure error on Windows 11 and Windows 10. The issue arises because modern Windows versions prefer IPv6 over IPv4 by default. When you type a ping command targeting a hostname, the system resolves it to an IPv6 address first. If your network infrastructure — router, modem, or ISP — does not fully support IPv6 routing, Windows cannot construct a valid local route for the ICMP packet, resulting in an immediate “General Failure” before the packet ever leaves the system.
This explains why many users see ping general failure Windows 11 errors while their browsers work without issues. Browsers gracefully fall back to IPv4 when IPv6 fails, but the ping utility does not always handle this fallback smoothly.
If your error shows “Request timed out” instead of “General Failure,” the issue is typically external ICMP blocking rather than a local stack failure. See our detailed guide on fixing Ping Request Timed Out while the internet still works.
Disable IPv6 Temporarily to Test (Step-by-Step)
Before making permanent changes, test whether IPv6 is actually the cause by disabling it temporarily:
- Press Win + R, type
ncpa.cpl, and press Enter to open the Network Connections window. - Right-click your active network adapter (Wi-Fi or Ethernet — whichever you are currently using) and select Properties.
- In the list of items, find Internet Protocol Version 6 (TCP/IPv6).
- Uncheck the box next to it. Do not uninstall it — simply uncheck.
- Click OK to apply.
Launch Command Prompt and run both ping google.com and ping 8.8.8.8 to verify where the connectivity issue lies. If both succeed without the general failure message, IPv6 was confirmed as the root cause.
An alternative quick test without changing adapter settings is to force IPv4 directly in the command: ping -4 google.com. If this works while a regular ping google.com fails, you have definitive confirmation of an IPv6 issue.
Re-Enable IPv6 If Needed After Testing
Disabling IPv6 permanently is not recommended by Microsoft, and certain Windows features — including DirectAccess, HomeGroup remnants, and some Windows Update delivery optimization paths — depend on IPv6 being active. If disabling IPv6 confirmed it as the cause, the better long-term approach is to fix the underlying IPv6 configuration rather than leaving it permanently off.
To do this properly, re-enable IPv6 in adapter properties using the same steps above (re-check the TCP/IPv6 box), then reset the IPv6 stack specifically by running these commands in an elevated Command Prompt:
netsh interface ipv6 resetRestart your computer after this command. The IPv6 stack reinitializes cleanly on reboot, often resolving the conflict without needing to keep IPv6 disabled. If the error returns even after a clean IPv6 reset, your router or ISP likely lacks proper IPv6 support — in that case, leaving IPv6 unchecked on the adapter is a practical workaround until your ISP upgrades their infrastructure.
Network Reset Commands (Powerful CMD Fixes)
When firewall and IPv6 adjustments don’t resolve the issue, the next logical step is resetting the core networking components inside Windows. A corrupted TCP/IP stack, stale DNS cache, or damaged Winsock catalog can all cause ping transmit failed errors that persist across reboots. These command-line fixes target each layer individually and are the most effective general-purpose solution for the ping general failure Windows 11 error.
Flush DNS, Release/Renew IP, Reset Winsock & TCP/IP
Each command below addresses a different networking layer. Run them in sequence in a Command Prompt opened as Administrator (right-click Start > Terminal (Admin) or search “cmd” and select Run as Administrator):
- ipconfig /flushdns — Removes all entries stored in the local DNS cache on your device. Stale or corrupted DNS entries can misdirect ICMP packets to invalid addresses, causing transmit failures. This command forces Windows to re-query DNS servers fresh.
- ipconfig /release — Surrenders the IP address currently assigned to your device by the DHCP server. This detaches your adapter from its existing IP configuration.
ipconfig /renew— Requests a new IP address from your DHCP server (router). Running release followed by renew eliminates IP conflicts and stale lease data.netsh winsock reset— Resets the Winsock catalog to its default clean state. Winsock is the interface between Windows applications (including ping) and the TCP/IP stack. VPN clients, proxy tools, and malware can inject corrupt Winsock LSP (Layered Service Provider) entries that silently break ICMP transmission.netsh int ip reset— Resets the entire TCP/IP stack by rewriting the registry keys that control TCP/IP behavior. This is the most aggressive reset and fixes deep stack corruption that survives normal reboots.
After running all five commands, restart your computer. The Winsock and TCP/IP resets do not take full effect until a reboot completes.
Complete Netsh Command List (Run as Administrator)
For convenience, here is the complete sequence to copy and run line by line:
ipconfig /flushdns
ipconfig /release
ipconfig /renew
netsh winsock reset
netsh int ip reset
netsh interface ipv4 reset
netsh interface ipv6 reset
The last two commands separately reset the IPv4 and IPv6 interface configurations, providing a more thorough cleanup than netsh int ip reset alone. After executing all commands and rebooting, test with ping 127.0.0.1, then ping 8.8.8.8. If ping 127.0.0.1 fails, the TCP/IP stack is still corrupted locally, and the issue remains inside Windows rather than on the router or ISP side.
If ping 8.8.8.8 fails while loopback works, the problem has shifted to a firewall, driver, or router-level block — revisit those sections accordingly.
Virtualization Software Issues (VMware & Hyper-V)
Virtualization software introduces virtual network adapters and internal virtual switches that sit alongside your physical network adapter. These virtual components can interfere with ICMP routing when misconfigured, causing ping transmit failures inside virtual machines and occasionally on the host operating system.
If you have VMware Workstation, VMware Player, or Hyper-V installed, this section applies directly to your situation.
Ping Transmit Failed in VMware – Common Fixes
The ping general failure VMware error typically occurs because of the virtual network adapter type assigned to the virtual machine. VMware creates adapters like VMnet1 (Host-Only) and VMnet8 (NAT) by default, and misconfigured adapter modes cause ICMP packets to fail silently.
Follow these steps to resolve it:
- Open VMware Workstation and select the affected virtual machine. Go to VM > Settings > Network Adapter.
- Check the current network connection mode. If it is set to Host-Only or Custom, switch it to Bridged or NAT depending on your use case. Bridged mode connects the VM directly to your physical network and resolves most ping failures.
- Under Bridged mode, click Configure Adapters and ensure only your active physical adapter is selected — uncheck VMware virtual adapters from the bridged list.
- If ping fails on the host machine (not inside the VM), open
ncpa.cplon the host, and check whether VMware virtual adapters have taken priority over your physical adapter. Right-click unused VMware adapters and select Disable temporarily, then test ping again.
Additionally, check Windows Firewall rules on both the host and guest OS. VMware virtual adapters often register under the “Public” firewall profile, which blocks ICMP by default as covered in the firewall section earlier.
Ping General Failure in Hyper-V – Network Adapter Check
Hyper-V creates a virtual switch that binds to your physical network adapter. This binding sometimes disrupts the host machine’s own network connectivity, leading to ping transmit failed Hyper-V errors on the host side.
To diagnose and fix:
- Open Hyper-V Manager and click Virtual Switch Manager in the right panel.
- Check which type of virtual switch is configured — External, Internal, or Private. An External switch shares your physical adapter with VMs and can cause host-side ping failures if misconfigured.
- If you suspect the virtual switch is causing problems, select it and verify the correct physical adapter is bound under the “External network” dropdown.
- As a quick test, open Device Manager > Network adapters on the host, and disable the Hyper-V Virtual Ethernet Adapter temporarily. Run
ping 8.8.8.8immediately after. If ping works, the virtual switch configuration needs adjustment. - Alternatively, open
ncpa.cpl, right-click your physical adapter, and go to Properties. Ensure that Hyper-V Extensible Virtual Switch is checked alongside IPv4 and IPv6 protocols. Missing bindings here cause silent transmission failures.
Driver and Update Fixes (Windows 11/10 Specific)
Network adapter drivers serve as the translation layer between Windows and your physical hardware. When this layer breaks — through corruption, version incompatibility, or forced updates — ICMP packets are among the first casualties because they rely on clean low-level adapter communication.
Update or Rollback Network Adapter Driver
Open Device Manager by pressing Win + X and selecting it from the menu. Expand the Network adapters section, right-click your primary adapter (Wi-Fi or Ethernet), and select Properties.
To update the driver:
- Click the Driver tab, then select Update Driver.
- Choose Search automatically for drivers first. If Windows finds nothing new, visit your adapter manufacturer’s website (Intel, Realtek, Qualcomm, Killer Networking) and download the latest driver manually.
- To install a manually downloaded driver, select Browse my computer for drivers and point it to the downloaded file location.
To rollback the driver:
If the ping transmit failed error started appearing after a recent driver update, rollback is the faster fix:
- In the same Driver tab, click Roll Back Driver. This option is only available if a previous driver version exists on the system.
- Select a reason when prompted, then click Yes. Windows restores the previously installed driver version.
- Restart your computer and test with
ping 8.8.8.8.
If both Update and Rollback options are greyed out, uninstall the adapter entirely by clicking Uninstall Device (check the box for “Attempt to remove the driver for this device”), then restart. Windows automatically reinstalls a fresh driver on reboot, which often resolves deep corruption.
Fix After Windows Update (Common Trigger)
The ping general failure after update scenario is widely reported, particularly following cumulative updates and major feature upgrades on Windows 11. Updates can reset firewall profiles, overwrite adapter drivers with generic Microsoft versions, or modify IPv6 registry settings without notification.
If the error appeared immediately after a Windows update:
- First, run the full network reset command sequence from the previous section — updates frequently corrupt the Winsock catalog and TCP/IP registry keys.
- Check your network profile: go to Settings > Network & Internet > Wi-Fi (or Ethernet) > your connection properties and confirm the profile is set to Private. Updates sometimes flip this to Public, which activates stricter firewall rules.
- If the issue persists, open Settings > Windows Update > Update History > Uninstall updates and remove the most recent update to test whether it was the direct cause. If ping works after uninstalling, pause updates temporarily and wait for Microsoft to release a patched version.
Router and ISP-Level Fixes (Especially for PTCL/Huawei Users)
When all local fixes — firewall, IPv6, drivers, TCP/IP reset — fail to resolve the error, the problem may exist outside your computer entirely. Certain routers and ISPs block ICMP traffic at the gateway level, either by default or through firmware configurations. This is particularly common with PTCL and Huawei-branded routers in South Asian regions, where ICMP is sometimes disabled to reduce network overhead.
Check If Router or ISP Is Blocking ICMP
Run this test to determine whether the block is router-level or ISP-level:
- Connect a second device (phone or another PC) to the same network and try pinging
8.8.8.8from it. If both devices show Request Timed Out, the router or ISP is likely blocking ICMP — not your computer. - On your PC, run
ping 192.168.1.1(your router’s gateway IP). Ifping 192.168.1.1succeeds butping 8.8.8.8returns Request Timed Out, ICMP is likely being blocked at the router’s WAN interface or by the ISP upstream. - Try running
tracert 8.8.8.8— if the trace stops at the first hop (your router) with asterisks, the router is dropping outbound ICMP before it reaches the internet.
Enable ICMP in Router Settings + Restart Router
Access your router’s admin panel by typing its gateway IP (usually 192.168.1.1 or 192.168.10.1) in a browser. Log in with your admin credentials and look for the following settings:
- Navigate to Security, Firewall, or Access Control settings (location varies by manufacturer).
- Look for an option labeled ICMP Flood Protection, Ping from WAN, or Respond to Ping. Enable the option that allows ICMP responses.
- On Huawei routers, check under Security > Firewall and set the firewall level to Low or disable WAN-side ICMP filtering specifically.
- Save settings and restart the router by unplugging power for 30 seconds, then reconnecting.
After the router reboots, test from your PC with ping 8.8.8.8. If the error persists even with ICMP enabled on the router, your ISP is likely filtering ICMP at a higher level — the Advanced Troubleshooting section below will help confirm this.
Advanced Troubleshooting If Still Failing
If you have worked through every fix above — firewall, IPv6, driver, TCP/IP reset, and router settings — and the ping transmit failed general failure error persists, deeper diagnostic tools can pinpoint exactly where the failure occurs. These two techniques isolate whether the block is local, at the router, or somewhere along the ISP path.
Use Tracert to See Where Packets Drop
The tracert (trace route) command maps every hop your packet takes between your computer and a destination. Unlike ping, which only tells you the final result, tracert reveals the exact point where transmission fails.
Open an elevated Command Prompt and run:
tracert 8.8.8.8Interpret the output carefully:
- If tracert immediately returns “General failure” before listing any hops, the packet cannot leave your machine. The issue remains local — likely an adapter driver problem, Winsock corruption, or a firewall rule you may have missed.
- If hop 1 succeeds but hop 2 or 3 shows asterisks — Your router forwarded the packet, but your ISP’s infrastructure is dropping ICMP. This strongly suggests ISP-level ICMP filtering. At this stage, local fixes are unlikely to resolve it.
- If the trace completes partially (several hops succeed, then asterisks appear) — An intermediate router along the internet path is blocking ICMP. This is normal behavior for some backbone routers and does not necessarily indicate a real connectivity problem.
For a more detailed picture, also run tracert -4 google.com to force IPv4 tracing and tracert -6 google.com to test IPv6 separately. If the IPv6 trace fails at hop 1 while the IPv4 trace completes successfully, you have strong confirmation that the IPv6 path on your network is misconfigured or unsupported.
Clear ARP Cache and Test Again
The ARP (Address Resolution Protocol) cache maps IP addresses to MAC addresses on your local network. Stale or corrupted ARP entries can cause your machine to send ICMP packets to the wrong hardware address, resulting in transmit failures that look identical to “General Failure.”
To clear the ARP cache, run these commands in an elevated Command Prompt:
arp -d *
netsh interface ip delete arpcache
The first command deletes all ARP entries. The second command performs a more thorough cleanup through the netsh interface. After running both, immediately test with ping 192.168.1.1 (your router) followed by ping 8.8.8.8. Fresh ARP entries will be rebuilt automatically during these ping attempts.
ARP cache corruption is especially common on networks with multiple devices sharing similar IP ranges, or after switching between Wi-Fi and Ethernet connections without properly disconnecting the previous adapter.
Final 10-Minute Diagnostic Checklist
Not all ping errors are caused by local transmission failure. If your system sends packets successfully but never receives replies, refer to our guide on diagnosing Ping Request Timed Out scenarios.
Use this checklist as a rapid step-by-step reference when this error appears. Work through each item in order — most cases resolve within the first five steps:
- Test loopback — Run
ping 127.0.0.1. If this fails, your TCP/IP stack is corrupted. Jump to step 7. - Force IPv4 — Run
ping -4 google.com. If this works, IPv6 is the problem. Disable IPv6 on your adapter. - Check IP configuration — Run
ipconfig /all. Look for missing gateway, APIPA address (169.254.x.x), or multiple active adapters. - Disable third-party antivirus firewall — Temporarily disable the network/firewall module, not just real-time scanning. Test ping immediately.
- Enable ICMP in Windows Firewall — Open
wf.msc, enable ICMPv4-In echo request rules for your active profile. - Disable virtual adapters — If VMware or Hyper-V is installed, disable their virtual network adapters in
ncpa.cpland retest. - Run full network reset — Execute all commands:
ipconfig /flushdns,ipconfig /release,ipconfig /renew,netsh winsock reset,netsh int ip reset. Reboot. - Update or rollback network driver — Open Device Manager, try updating first. If the error started after an update, rollback instead.
- Check router ICMP settings — Log into your router admin panel, enable ICMP/ping responses, restart the router.
- Run tracert — Execute
tracert 8.8.8.8to identify whether packets fail locally, at the router, or at the ISP level. If ISP-level, contact your provider.

FAQ – Common Questions & Answers
What does “Transmit Failed General Failure” mean in ping?
It means Windows could not send the ICMP echo request packet from your computer. Unlike “Request timed out” (where the packet was sent but no reply returned), “General Failure” indicates the packet was blocked or rejected locally by your operating system’s networking stack before it ever reached the network.
Why does ping give general failure on Windows 11/10 but internet works?
Web browsers use TCP connections (ports 80 and 443) which pass through different processing paths than ICMP packets used by ping. A firewall rule, corrupted Winsock entry, or IPv6 conflict can block ICMP specifically while leaving TCP-based browsing completely functional.
Can IPv6 cause ping transmit failed general failure error?
Yes, and it is the single most common cause on Windows 11. When ping defaults to IPv6 resolution but your network lacks proper IPv6 support, the ICMP packet fails instantly. Testing with ping -4 google.com confirms this. Disabling IPv6 on the adapter or resetting the IPv6 stack with netsh interface ipv6 reset resolves it.
How do I fix ping general failure in VMware or Hyper-V?
In VMware, switch the VM’s network adapter to Bridged mode and ensure only your physical adapter is selected in bridge configuration. In Hyper-V, check Virtual Switch Manager for correct physical adapter binding and temporarily disable the Hyper-V Virtual Ethernet Adapter on the host to test. Disable unused virtual adapters in ncpa.cpl on the host machine.
Does firewall or antivirus cause this ping error?
Yes. Both Windows Defender Firewall and third-party antivirus suites with built-in firewalls can block ICMP echo requests. The “Public” network profile in Windows Firewall blocks ICMP by default. Enable ICMPv4-In rules in wf.msc and check your antivirus firewall component separately.
How do I reset TCP/IP and Winsock to fix general failure?
Open Command Prompt as Administrator and run these commands in sequence: ipconfig /flushdns, ipconfig /release, ipconfig /renew, netsh winsock reset, netsh int ip reset, netsh interface ipv4 reset, netsh interface ipv6 reset. Restart your computer after running all commands for the reset to take full effect.
Why does this error appear after a Windows update?
Windows updates can overwrite network adapter drivers with generic versions, reset firewall profiles from Private to Public, modify IPv6 registry settings, or corrupt Winsock catalog entries. Running the full network reset command sequence and verifying your network profile setting resolves most post-update ping failures. If not, uninstalling the specific update through Settings > Windows Update > Update History confirms whether the update was the trigger.
When should I contact my ISP if ping still fails?
Contact your ISP when all local fixes are exhausted and tracert 8.8.8.8 shows packets failing beyond your router (hop 2 or later), when a second device on the same network also cannot ping external addresses, or when your router’s ICMP settings are already enabled but external pings still fail. These patterns confirm the block exists at the ISP infrastructure level, which only your provider can resolve.