Your router is working. Your internet plan is fast. Your speed test results look perfectly fine. Yet somehow, WiFi still feels sluggish — pages hang, video calls stutter, and streaming buffers at the worst possible moments. If this sounds familiar, the issue might not be your internet connection at all. It might be the WiFi channel your router is using.
WiFi channel congestion is one of the most overlooked causes of poor wireless performance, especially in apartments, townhouses, and dense neighborhoods where dozens of routers compete for the same radio frequencies. The good news is that finding the best WiFi channel on Windows 11 is straightforward once you know how to use a WiFi analyzer — and the best tools for the job are completely free.
This guide walks through exactly how to find the best WiFi channel using a WiFi analyzer on Windows 11, how to read the results, and how to change the channel on your router to fix the problem.
What WiFi Channel Congestion Is and Why It Slows Down Your Internet
WiFi channel congestion happens when multiple wireless networks in your area broadcast on the same channel or on overlapping channels. Every WiFi router transmits data using a specific radio frequency channel. When too many routers share the same channel, they have to take turns transmitting — and that waiting creates delay, dropped data, and inconsistent speeds that directly affect your experience.
Think of it like a crowded hallway. Even if each person can walk fast individually, when everyone tries to move through the same narrow corridor at the same time, everyone slows down. That is exactly what happens on a congested WiFi channel.
Why Your Speed Test Shows Fast Speeds But WiFi Still Feels Slow
Speed tests measure raw throughput between your device and a test server. They run for a few seconds under ideal burst conditions, which often bypasses the real-world effects of channel congestion. A speed test might report 200 Mbps, but if your WiFi channel is constantly contested by neighboring networks, your actual browsing, gaming, and streaming experience will feel far slower because of micro-interruptions that speed tests do not capture.
This is one of the most common reasons your WiFi speed test shows fast results but everything still feels slow. The bottleneck is not bandwidth — it is airtime competition on a crowded channel.
What Happens When Neighbors Use the Same WiFi Channel as You
When neighboring routers operate on the same channel as yours, every device on every one of those networks must contend for the same radio airtime. Your router cannot transmit while a neighbor’s router is transmitting on the same frequency — it has to wait. This constant back-and-forth negotiation introduces latency spikes and throughput drops that worsen as more networks pile onto the same channel.
The problem gets significantly worse during evening hours when most households are actively streaming, gaming, and video calling simultaneously. If you have ever noticed that your internet slows down noticeably at night, channel congestion from surrounding networks is very likely a contributing factor. The more routers sharing your channel, the less consistent your connection becomes — regardless of how fast your internet plan actually is.
What WiFi Channels Are and How They Work
Before scanning for congestion, it helps to understand what WiFi channels actually are and why some are better choices than others. A WiFi channel is a specific frequency range within either the 2.4GHz or 5GHz radio band that your router uses to send and receive data. Each band is divided into numbered channels, and your router operates on one of these channels at any given time.
The challenge is that not all channels are created equal. Some overlap with each other, some are wider than others, and the two bands behave very differently in terms of congestion and range. Understanding these differences is what allows you to make an informed channel selection instead of guessing.
2.4GHz Channels Explained — Why Only 3 Are Non-Overlapping
The 2.4GHz band has 11 usable channels in most regions, numbered 1 through 11. However, each channel is 20MHz wide and they are spaced only 5MHz apart. This means most channels bleed into their neighbors — channel 3, for example, overlaps with channels 1 through 5. This overlap creates interference that is often worse than sharing the exact same channel, because overlapping signals disrupt each other without any coordination.
Because of this spacing, only three channels in the 2.4GHz band are truly non-overlapping: channels 1, 6, and 11. These are the only channels that do not interfere with each other’s frequency range. This is exactly why every WiFi channel overlap fix for a home network starts with the same advice — always choose 1, 6, or 11 on 2.4GHz, never anything in between.
When you pick a channel like 3 or 9, your router ends up partially overlapping with networks on multiple adjacent channels, creating more interference than if it simply shared channel 1 or 6 with a neighbor. Co-channel contention, where two routers share the same channel, is actually managed better by modern routers than the uncoordinated chaos of overlapping channels.
5GHz Channels Explained — Why It Has Less Congestion
The 5GHz band offers significantly more channels — typically 25 or more non-overlapping channels depending on your region and router capabilities. This abundance of channels is the primary reason the 5GHz band experiences far less congestion than 2.4GHz in most environments.
Each 5GHz channel can also operate at wider bandwidths without overlapping neighboring channels the way 2.4GHz channels do. The tradeoff is range — 5GHz signals do not travel as far and are more easily blocked by walls and obstacles. But in terms of finding a clean, uncongested channel, the 5GHz band gives you far more options. For most users dealing with WiFi slowness caused by channel crowding, the 2.4GHz vs 5GHz channel selection decision is often the single biggest factor.
In dense environments like apartment buildings, the 5GHz band is almost always the better choice when your device is within reasonable range of the router. The combination of more available channels and fewer competing networks makes congestion-related latency much less likely on 5GHz.
What Channel Width Means — 20MHz vs 40MHz vs 80MHz
Channel width determines how much frequency space a single channel occupies. A wider channel can carry more data at once, which means higher potential throughput — but it also takes up more of the available spectrum, increasing the chance of overlap with neighboring networks.
On the 2.4GHz band, using anything wider than 20MHz is generally a bad idea. A 40MHz-wide channel on 2.4GHz consumes more than a third of the entire band, making overlap with nearby networks almost guaranteed. Stick with 20MHz on 2.4GHz.
On the 5GHz band, 40MHz and 80MHz widths are practical because there is enough spectrum to accommodate wider channels without constant overlap. Most modern routers default to 80MHz on 5GHz, which provides a good balance between throughput and congestion avoidance. Some WiFi 6 and WiFi 6E routers even support 160MHz widths, though these are only useful in very clean RF environments with minimal neighboring networks.
Understanding channel width matters because a WiFi analyzer will show you not just which channel a network is on, but how wide that channel is — and a single 80MHz network can occupy the space of four 20MHz channels. This context is essential when reading analyzer results in the next section.
The Best Free WiFi Analyzer Tools for Windows 11
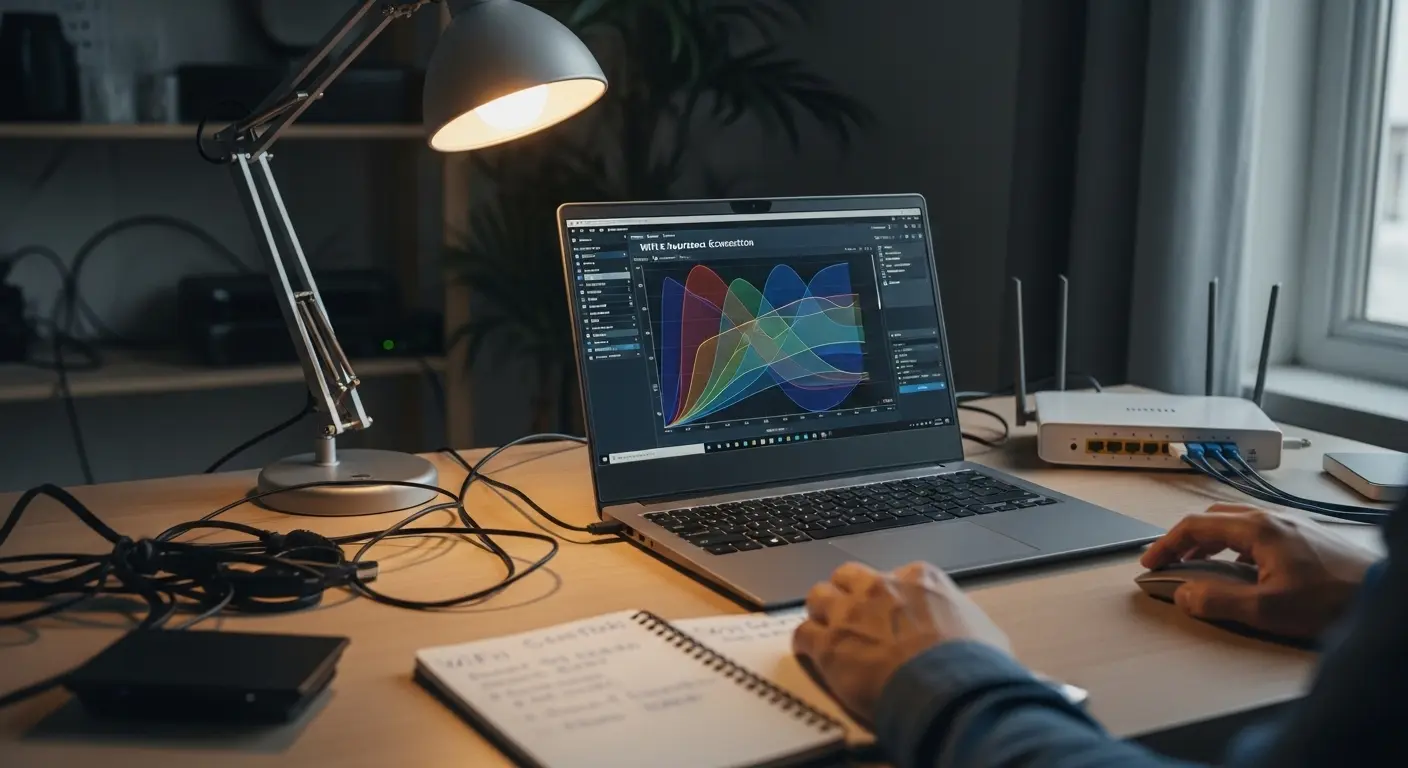
Finding the best WiFi channel on Windows 11 requires seeing what is happening on the airwaves around you — which networks are nearby, what channels they occupy, how strong their signals are, and where the congestion is worst. A WiFi analyzer does exactly this by scanning your wireless environment and presenting the data visually.
Several free WiFi analyzer tools work well on Windows 11, each with different strengths. The right choice depends on whether you want a quick overview or a more detailed breakdown of your wireless environment. Below are the four best free options available right now.
WiFi Analyzer — Free Microsoft Store App — Best for Beginners
WiFi Analyzer is a free app available directly from the Microsoft Store. It is the easiest starting point for anyone who has never used a wireless scanning tool before. The app displays a clear channel graph showing every detected network, its signal strength, and which channel it occupies. It also includes a built-in recommendation feature that suggests the least congested channel for your network.
The interface is clean and visual, making it easy to spot overlapping networks at a glance. For most home users trying to diagnose WiFi channel congestion on Windows 11, this app provides everything needed without any technical complexity. It works with both 2.4GHz and 5GHz bands and updates in real time as you keep it open.
Acrylic WiFi Home — Best for Seeing Channel Congestion Detail
Acrylic WiFi Home is a free desktop application that goes a step beyond the basic Microsoft Store app. It provides detailed information about every network in range, including the exact channel width each network uses, the security protocol, and the access point vendor. The channel visualization is more detailed, allowing you to see not just which channels are occupied but how much of the spectrum each network actually consumes based on its channel width setting.
This level of detail is particularly helpful in dense environments where dozens of networks are visible and you need to understand exactly how much interference each one creates. If you want a more thorough picture of your wireless environment before making a channel decision, Acrylic WiFi Home is the better choice.
inSSIDer — Best for Seeing Signal Strength Over Time
inSSIDer has been one of the most well-known WiFi analysis tools for years. Its standout feature is the ability to track signal strength over time, showing you a live graph of how each nearby network’s signal fluctuates. This is useful for identifying intermittent interference — networks that appear and disappear or signals that spike during certain times of day.
The free version of inSSIDer provides enough functionality for channel analysis, though some advanced features require a paid license. Where inSSIDer excels over simpler tools is in helping you understand not just the current state of your wireless environment, but how it changes over time. This makes it valuable for troubleshooting issues that feel slow inconsistently rather than constantly.
WifiInfoView — Best Lightweight Option No Install Needed
WifiInfoView is a portable utility from NirSoft that requires no installation — you simply download it, extract the file, and run it. It displays a table of every detected wireless network with detailed technical data including channel number, signal strength (in dBm), frequency, channel width, PHY type, and more.
WifiInfoView does not include graphical channel visualizations like the other tools. Instead, it presents raw data in a sortable table format that power users and IT professionals often prefer. It is extremely lightweight, runs on virtually any Windows 11 system, and provides all the data needed to identify channel congestion — you just have to interpret the numbers yourself rather than reading a graph.
For users who want a quick scan without installing anything, WifiInfoView is the fastest path to raw channel data on Windows 11.

How to Use WiFi Analyzer to Find Channel Congestion on Windows 11
Now that you know which tools are available, this section walks through the actual process of scanning your wireless environment and identifying the best channel. The walkthrough uses the free WiFi Analyzer app from the Microsoft Store since it is the most visual and beginner-friendly option, but the logic applies to any tool — you are always looking for the same thing: which channels are crowded and which ones have room.
Step 1 — Download and Open WiFi Analyzer
Open the Microsoft Store on your Windows 11 computer, search for “WiFi Analyzer,” and install the free app. Once installed, launch it and grant it permission to access your wireless adapter when prompted. The app will immediately begin scanning and display a list of every WiFi network your adapter can detect.
Make sure you are scanning from the location where you actually use WiFi most — your desk, living room, or wherever the connection feels slowest. WiFi congestion varies by location within your home because signal strength from neighboring routers changes depending on distance and obstacles. Scanning from the right spot gives you the most accurate picture of the interference your devices actually experience.
Step 2 — Read the Channel Graph and Find Overlapping Networks
Switch to the channel graph view in WiFi Analyzer. This view plots every detected network along the horizontal axis by channel number, with signal strength on the vertical axis. Each network appears as a curved hump centered on its channel.
What you are looking for is stacking — multiple network humps piled on top of each other on the same channel or on overlapping channels. The taller the hump, the stronger that network’s signal at your location, which means it creates more interference for your router. A weak signal from a distant neighbor on the same channel is less of a problem than a strong signal from the apartment next door.
Pay special attention to the 2.4GHz view first since this band is where congestion is most severe. Toggle to the 5GHz view separately to compare how crowded each band is in your environment.
Step 3 — Identify Which Channel Has the Least Competition
On the 2.4GHz graph, focus only on channels 1, 6, and 11. Count how many networks sit on each of these three channels and note their signal strengths. The best channel is the one with the fewest networks — and ideally the one where competing signals are weakest (shortest humps on the graph).
If channel 1 has six networks stacked on it, channel 6 has two, and channel 11 has three, then channel 6 is your best option. If two channels have the same number of networks, choose the one where competing signals are weaker. A channel with two weak distant networks is far better than a channel with two strong nearby ones.
On 5GHz, the process is similar but easier because there are far more channels available. Look for channels with zero or minimal competing networks. In many home environments, you will find several completely empty 5GHz channels, which is ideal.
Step 4 — Note the Best Available Channel for 2.4GHz and 5GHz
Write down the best channel you identified for each band. For 2.4GHz, your answer should be one of three options — 1, 6, or 11. For 5GHz, note the specific channel number that showed the least activity.
Also note your router’s current channel. If your router is already on the least congested channel, then channel congestion may not be your primary problem and you should investigate other causes such as packet loss or jitter affecting your connection quality. But if your router is sitting on the most crowded channel — which is surprisingly common when routers are left on automatic channel selection — then changing it manually can produce an immediate and noticeable improvement.
Keep the analyzer open after making changes later so you can verify the results. The next section covers exactly how to log into your router and apply the new channel setting.
How to Change Your WiFi Channel on Your Router
Once you have identified the least congested channel using a WiFi analyzer, the next step is applying that change on your router. This requires logging into your router’s settings page and manually setting the wireless channel for each band. The process varies slightly between router brands, but the general steps are the same across most consumer routers.
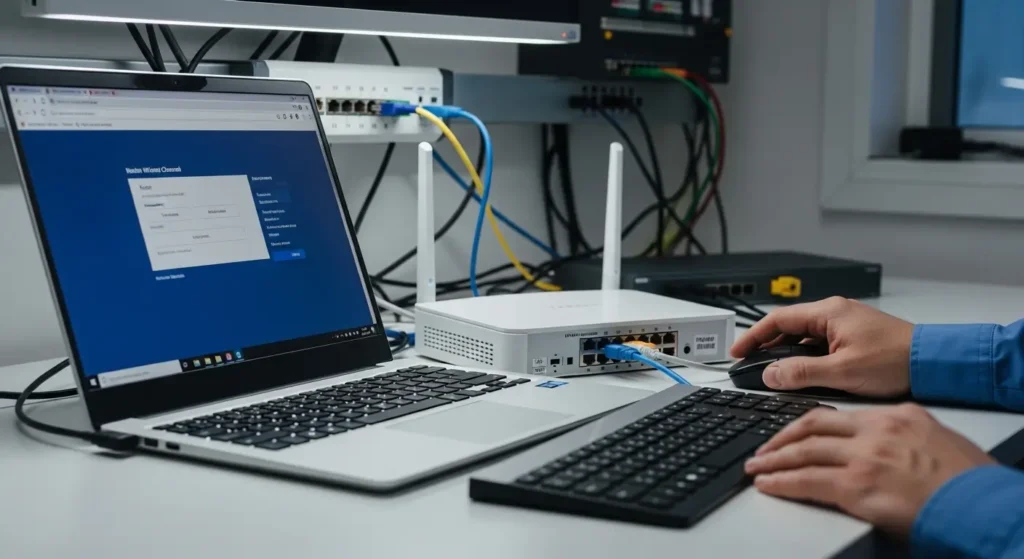
How to Log Into Your Router Settings Page
Your router’s settings page is accessed through a web browser. Open any browser on a device connected to your network and type your router’s IP address into the address bar. The most common default addresses are 192.168.1.1 or 192.168.0.1. If neither works, you can find the correct address by opening Command Prompt on Windows 11, typing ipconfig, and looking at the Default Gateway value — that is your router’s IP address.
You will be prompted for a username and password. If you have never changed these, they are usually printed on a sticker on the bottom or back of your router. Common defaults include “admin” for both fields, or “admin” as the username with the password left blank. If your login credentials have been changed and you do not remember them, you may need to factory reset the router — though be aware this will erase all custom settings. If you run into login issues or connection drops during this process, an authentication error troubleshooting guide can help resolve access problems.
Where to Find the WiFi Channel Setting in Your Router
Once logged in, navigate to the wireless settings section. Depending on your router brand, this might be labeled as Wireless, WiFi Settings, Radio Settings, or Advanced Wireless. Most routers separate 2.4GHz and 5GHz settings into different tabs or sections, so you will need to change the channel for each band individually.
Look for a dropdown menu labeled Channel or Wireless Channel. By default, most routers have this set to Auto, which means the router selects a channel on its own during startup. You will be changing this from Auto to a specific channel number based on your analyzer results.
Which Channel to Choose for 2.4GHz — 1, 6 or 11 Only
For the 2.4GHz band, always choose channel 1, 6, or 11. These are the only three non-overlapping channels, and selecting anything else — like channel 3, 4, 8, or 9 — creates partial overlap interference with multiple neighboring channels simultaneously. That kind of uncoordinated interference is worse than sharing a channel cleanly with another network.
Select whichever of the three channels your WiFi analyzer showed had the fewest competing networks and the weakest competing signals. If all three look equally congested, choose channel 1 or 11 since many routers and default configurations tend to favor channel 6, often making it the most crowded of the three.
Which Channel to Choose for 5GHz
For 5GHz, select the specific channel number that your analyzer showed was empty or had the fewest networks. Common 5GHz channels include 36, 40, 44, 48, 149, 153, 157, 161, and 165. Channels in the 36–48 range and the 149–165 range are the most commonly available on consumer routers.
Some 5GHz channels fall within DFS (Dynamic Frequency Selection) ranges — channels 52 through 144. These channels are shared with radar systems, and your router must yield to radar signals if detected, which can cause momentary disconnections. Unless your environment has severe congestion on the standard 5GHz channels, it is generally safer to stick with non-DFS channels like 36, 40, 44, 48, or those in the 149–165 range.
Should You Use Auto Channel Selection or Manual
Auto channel selection sounds convenient, but it is often the reason your router ends up on a congested channel in the first place. Most routers only evaluate channel conditions during boot — when the router first powers on or restarts. They do not continuously monitor and switch channels during operation. This means your router might have selected a clean channel at 3 AM when it last rebooted, but by evening that same channel could be packed with competing networks.
Manual channel selection gives you direct control. After scanning your environment with a WiFi analyzer during peak usage hours — typically evening — you can set the channel that is genuinely least congested when it matters most. The only downside is that your wireless environment can change over time as neighbors add or replace routers. It is worth rescanning every few months and adjusting if needed.
After setting the new channel for both bands, click Save or Apply in your router settings. The router will briefly disconnect all connected devices while it switches channels. Devices will automatically reconnect within a few seconds. Once reconnected, leave your WiFi analyzer open to confirm your network is now broadcasting on the new channel.
How to Check If Changing the Channel Actually Fixed the Problem
Switching to a less congested channel should produce a noticeable improvement, but it is important to verify the results rather than assume the fix worked. A quick before-and-after comparison using your WiFi analyzer and a speed test will confirm whether the change made a real difference.
How to Confirm Signal Strength Improved After Channel Change
Reopen your WiFi analyzer tool and verify that your network is now broadcasting on the new channel. The graph should show your network sitting in a less crowded part of the spectrum than before. While your own signal strength in dBm will not change — that depends on your router hardware and distance — what should change is the amount of competition around your channel.
Look for fewer overlapping networks on your new channel compared to the old one. If your previous channel had five or six competing networks and the new one has one or two, your wireless airtime contention has been significantly reduced. You should notice more consistent connectivity, fewer micro-interruptions during video calls, and smoother streaming — especially during peak evening hours.
How to Run a Before and After Speed Test Comparison
Ideally, you ran a speed test before changing the channel so you have a baseline. If not, run one now and compare it against your typical results. Use a reliable testing tool from this list of best internet speed test tools to get accurate readings. Run the test multiple times at different times of day, since channel congestion fluctuates based on when neighbors are active.
Pay attention to consistency more than raw speed. If your previous results jumped between 40 Mbps and 180 Mbps across tests but now consistently land between 150 Mbps and 190 Mbps, the channel change is working. Stable throughput is a stronger indicator of reduced congestion than a single high-speed result.
Other Reasons WiFi Feels Slow That a Channel Change Will Not Fix
Channel congestion is a common culprit, but it is not the only one. If switching channels did not improve your experience, the problem may lie elsewhere. Router placement is a frequent issue — a router tucked in a closet or behind furniture produces weaker signals regardless of channel. Outdated router firmware can also cause performance degradation and stability issues.
Hardware limitations matter too. An older router that only supports WiFi 4 or WiFi 5 will bottleneck faster internet plans. Similarly, if your device’s wireless adapter is outdated, it may not fully utilize the router’s capabilities. Distance from the router, thick walls, and interference from non-WiFi devices like microwaves and cordless phones can all degrade signal quality in ways that no channel change will resolve.
If you have optimized your channel, verified your signal strength, and still experience persistent slowness, the issue might be on the ISP side — especially if wired Ethernet connections show the same problems. For a broader look at diagnosing connectivity issues beyond WiFi channels, the internet connectivity explained guide covers additional diagnostic approaches.
Frequently Asked Questions
How do I find the best WiFi channel on Windows 11?
Download a free WiFi analyzer app on Windows 11, open the channel graph view, and identify which channel — 1, 6, or 11 on 2.4GHz — has the fewest competing networks with the weakest signals. That is your best channel. For 5GHz, look for any channel with zero or minimal nearby networks.
What is the best free WiFi analyzer for Windows 11?
WiFi Analyzer from the Microsoft Store is the best option for beginners. It is completely free, displays clear channel graphs, and recommends the least congested channel automatically. For more detailed analysis, Acrylic WiFi Home and WifiInfoView are excellent free alternatives.
Why is my WiFi slow even though my speed test shows fast speeds?
Speed tests measure short bursts of throughput under ideal conditions. Channel congestion causes intermittent delays and airtime contention that speed tests do not capture. The result is fast test numbers but sluggish real-world browsing, buffering, and call quality.
What WiFi channels should I use for 2.4GHz?
Always use channel 1, 6, or 11. These are the only three non-overlapping channels in the 2.4GHz band. Choosing any other channel creates partial overlap interference with adjacent channels, which is worse than sharing a channel cleanly.
What is the best WiFi channel for 5GHz?
The best 5GHz channel is whichever one your WiFi analyzer shows as empty or least occupied. Channels 36, 40, 44, 48, 149, 153, 157, 161, and 165 are the most commonly available. Avoid DFS channels (52–144) unless standard channels are severely congested.
What is WiFi channel congestion and how does it affect my speed?
Channel congestion occurs when multiple routers transmit on the same or overlapping channels. Each router must wait for others to finish transmitting before sending its own data, creating delays, inconsistent speeds, and dropped packets — even when your internet plan is fast.
Does changing the WiFi channel actually improve internet speed?
Yes, if channel congestion was the cause of your slowness. Moving to a less crowded channel reduces airtime contention, which improves consistency, lowers latency, and often increases real-world throughput. It will not help if the problem is your internet plan speed itself or hardware limitations.
How do I know if my WiFi channel is congested?
Open a WiFi analyzer on Windows 11 and look at the channel graph. If multiple networks are stacked on the same channel as yours — especially strong signals from nearby routers — your channel is congested. The more networks sharing your channel, the worse the contention.
Resolution Summary
WiFi channel congestion is one of the most fixable causes of slow, inconsistent wireless performance. By scanning your environment with a free WiFi analyzer on Windows 11, identifying the least crowded channel, and manually setting it on your router, you eliminate unnecessary competition for radio airtime that directly impacts your daily internet experience.
If changing the channel resolves the problem, rescan every few months to make sure your chosen channel remains the best option as neighboring networks change. If the problem persists after optimizing your channel, check your router placement, firmware version, and hardware age. And if wired connections show the same slowness, the issue is upstream — contact your ISP for line diagnostics, as the problem is no longer within your local network’s control.