
Why Speed Test Fast But Video Calls Lag or Freeze
You run a speed test, see 100 Mbps or more, and assume your connection is solid. Then you hop on a Zoom call and within minutes the video freezes, audio cuts out, and colleagues start asking if you’re still there. This disconnect between speed test results and real-world video call performance is one of the most common — and most misunderstood — networking frustrations.
The reason is straightforward once you understand what a speed test actually measures. A speed test measures raw throughput — how much data your connection can move in bulk over a short burst. It tells you nothing about the consistency, timing, or reliability of that data delivery. Video calls don’t need much bandwidth. Zoom, Microsoft Teams, and Google Meet typically require only 2–4 Mbps for a high-quality 1080p call. What they demand instead is stable, low-latency, loss-free packet delivery — second by second, without interruption.
So when your video call stutters despite a fast speed test, the problem almost never lies with bandwidth. It lies with network quality metrics that speed tests don’t surface: latency, jitter, packet loss, and bufferbloat. Understanding each of these is the first step toward diagnosing and fixing call quality issues for good.
You can quickly diagnose network delay and stability by running a ping test, which measures how long it takes for data to travel to a server and back.
One of the most common causes of unstable video calls is jitter, where inconsistent packet timing causes audio distortion and frozen video.

The Real Network Factors That Break Video Calls
Four network-layer factors directly determine whether your video call runs smoothly or falls apart. Each one affects the real-time data stream that voice and video depend on, and none of them show up in a basic download speed test.
Latency – Delay in Packet Arrival
Latency is the time it takes for a data packet to travel from your device to the video call server and back. It’s measured in milliseconds (ms) and commonly referred to as ping. For video calls, latency under 50 ms is ideal. Between 50–150 ms, you’ll notice slight delays in conversation. Above 150 ms, calls become difficult — people talk over each other, responses feel sluggish, and the experience degrades noticeably.
High latency can come from long physical distance to the server, congested network paths, overloaded routers, or a poorly performing DNS resolver. Even if your bandwidth is excellent, a latency of 200 ms will make any video call feel broken. This is why someone on a 20 Mbps fiber connection with 15 ms latency will have a far better Zoom experience than someone on a 200 Mbps cable connection with 180 ms latency.
Jitter – Inconsistent Packet Timing
Jitter measures the variation in packet arrival times. If one packet arrives in 10 ms, the next in 45 ms, and the third in 8 ms, that inconsistency is jitter. Video call applications use small buffers to compensate for minor jitter, but when the variation exceeds roughly 30 ms consistently, audio starts to sound robotic, video frames skip, and synchronization between audio and video breaks down.
Jitter is particularly common on congested Wi-Fi networks, shared cable internet segments, and connections where background downloads or uploads compete with real-time traffic. It’s a silent quality killer — your connection may still feel “fast” for web browsing while jitter quietly destroys your call quality.
Packet Loss – Missing Audio/Video Frames
Packet loss occurs when data packets sent between your device and the call server never arrive at their destination. Even 1–2% packet loss can cause visible video freezing and audible audio dropouts during a call. At 5% or higher, calls become essentially unusable.
In some cases packet loss may also trigger routing errors such as “Destination Host Unreachable.” See our guide on destination host unreachable ping fix.
Unlike web browsing or file downloads — where lost packets are automatically retransmitted — video calls operate in real time and cannot wait for retransmissions. A lost packet means a lost video frame or a gap in audio, with no way to recover it after the moment has passed.
Bufferbloat – Router Queue Overload
Bufferbloat is a less well-known but extremely common cause of video call lag on fast connections. It happens when your router or modem has oversized network buffers that queue too many packets during periods of high usage. Instead of dropping excess packets quickly (which would signal congestion and trigger normal flow control), the router holds them in a long queue. This artificially inflates latency — sometimes by hundreds of milliseconds — precisely when the network is busy.
The result is predictable: you start a large download or someone else on your network begins streaming, and suddenly your video call latency spikes from 20 ms to 400 ms or more. Your speed test still shows high throughput because bufferbloat doesn’t reduce bandwidth — it destroys latency under load, which is exactly the condition video calls cannot tolerate.
How Video Calls Differ From Speed Tests
Understanding why a speed test passes with flying colors while your Zoom call freezes requires looking at how each type of traffic actually works at the protocol level. The difference is fundamental, and it explains why bandwidth alone is a poor predictor of call quality.
Video Calls Use UDP – Speed Tests Use TCP
Speed tests almost exclusively use TCP (Transmission Control Protocol). TCP is designed for reliability — if a packet is lost, it’s automatically retransmitted. If packets arrive out of order, TCP reassembles them correctly. The result is a clean, complete data transfer that maximizes throughput. That’s exactly what a speed test is designed to measure.
Video calls, on the other hand, rely on UDP (User Datagram Protocol) for their media streams. UDP has no built-in retransmission. Packets are sent once, and if they don’t arrive, they’re gone. There’s no error correction, no reordering, and no waiting. This makes UDP faster and lighter — which is essential for real-time communication — but it also means that every network imperfection shows up immediately as degraded audio or video.
When your speed test reports 150 Mbps, it’s telling you what TCP can achieve under ideal burst conditions. It reveals nothing about how UDP traffic — the actual protocol your call depends on — performs on your connection.
Real-Time Requirements vs Bulk Download
A speed test transfers a large chunk of data as quickly as possible over several seconds. It doesn’t care if the first megabyte takes slightly longer than the last. Total throughput is the only metric that matters.
Video calls work entirely differently. They generate a continuous, time-sensitive stream of small packets — typically every 20 milliseconds for audio and every 33 milliseconds for 30fps video. Each packet must arrive within a tight window or it becomes useless. A packet that arrives 200 ms late is functionally identical to a packet that never arrived at all, because the moment it was needed has already passed.
This is why a connection that handles large file downloads effortlessly can still fail at delivering the steady, low-latency stream that a video call requires. Bulk transfer performance and real-time streaming performance are fundamentally different capabilities.
Low Bandwidth Tolerance of Voice/Video
Most people overestimate how much bandwidth video calls need. Zoom’s official requirements list 1.5–3 Mbps for a 1080p video call. Microsoft Teams is similar, recommending 1.5 Mbps upload and download for HD quality. Google Meet operates within comparable ranges.
This means a 50 Mbps connection has roughly 15–25 times more bandwidth than any video call requires. Adding more speed beyond that threshold does absolutely nothing for call quality. Once minimum bandwidth is met, the entire experience depends on latency, jitter, and packet loss — the metrics covered in the previous section. This is precisely why video calls lag with fast internet for so many users: they’re solving for the wrong variable.
Quick Checks to Diagnose Video Call Issues
Before changing any settings or hardware, you need data. Guessing at network problems wastes time. A few targeted tests, run during or just before a call, will reveal exactly which network factor is causing your lag or freezing.
Run Continuous Ping During Call
The simplest and most revealing diagnostic is a continuous ping test running alongside your video call. This shows your real-time latency to an external server, updated every second, so you can see exactly when and how latency spikes correlate with call degradation.
On Windows, open Command Prompt and run:
ping -t 8.8.8.8Network administrators often add timestamps to ping output to track latency spikes during real-time traffic. See our guide on ping with timestamp command explained.
On macOS or Linux, open Terminal and run:
ping 8.8.8.8The -t flag on Windows makes the ping run continuously rather than stopping after four packets. On macOS and Linux, ping runs continuously by default. The target 8.8.8.8 is Google’s public DNS server — a reliable, always-available endpoint.
If hostname resolution behaves differently from direct IP ping, DNS may be the cause. See our guide on why ping works on IP but not hostname.
Watch the results during your call. Stable latency under 50 ms with no spikes means latency is not your problem. If you see sudden jumps to 200 ms or higher — especially when someone else on the network starts streaming or downloading — you’re likely dealing with bufferbloat or congestion.
Test Jitter and Packet Loss
A basic ping test shows latency but doesn’t calculate jitter or report packet loss percentages clearly over time. For a more complete picture, use a tool designed for real-time connection quality assessment.
On any platform, you can run a measured ping sequence and review the summary. On Windows:
ping -n 100 8.8.8.8This sends exactly 100 packets and then displays a summary including minimum, maximum, and average latency, plus the number of lost packets. A large gap between minimum and maximum latency indicates high jitter. Any packet loss above 0% warrants investigation.
For a more detailed jitter and loss analysis, browser-based tools like those provided by your ISP’s diagnostics page or Cloudflare’s speed test can measure jitter directly. These tools test UDP-like traffic patterns and report jitter in milliseconds — giving you a much more accurate picture of how your connection handles real-time traffic compared to a standard speed test.
Check Speed Test vs Real Latency
Run a standard speed test and note the reported ping value. Then compare it against your continuous ping results during a period of network activity — when other devices are streaming, downloading, or uploading. If the speed test shows 15 ms latency but your ping under load shows 300 ms, the gap between those two numbers is your problem. That gap almost always points to bufferbloat or local network congestion, and it explains exactly why your speed test looks perfect while your video calls fall apart.
How to Fix High Latency for Video Calls
Once your diagnostic tests confirm that latency is elevated — either consistently or under load — the next step is reducing it. High latency during video calls creates that awkward conversation delay where participants constantly talk over each other, and in worse cases, causes the call platform to degrade video quality or drop frames entirely. The fixes here target the most common and impactful causes.
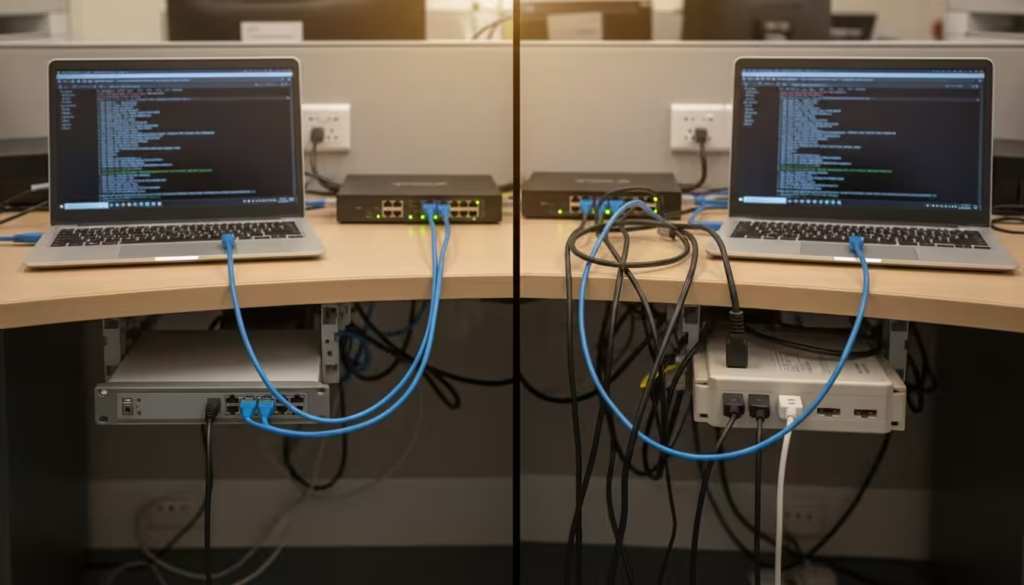
Switch to Wired Connection
Wi-Fi adds latency at every step. Your device must contend for airtime on a shared radio channel, negotiate with the router, and deal with interference from walls, appliances, and neighboring networks. Even on a strong Wi-Fi signal, this overhead typically adds 5–15 ms of latency compared to Ethernet — and on a congested or poorly positioned network, it can add 50 ms or more with frequent spikes.
Connecting your computer directly to the router with an Ethernet cable eliminates all of this. A standard Cat5e or Cat6 cable provides a dedicated, interference-free link with consistent sub-1 ms local latency. For laptop users without an Ethernet port, a USB-to-Ethernet adapter costs very little and delivers the same benefit. If running a cable to your workspace isn’t feasible, powerline Ethernet adapters offer a reasonable middle ground — they won’t match a direct cable, but they typically outperform Wi-Fi for latency stability.
This single change resolves video call lag for a significant number of users, particularly those on crowded 2.4 GHz Wi-Fi networks or in apartments with dozens of competing access points.
Reduce Hop Count to Server
Every router and network node between your device and the video call server adds processing delay. You can see exactly how many hops your traffic takes and where delays accumulate using the traceroute command.
On Windows, open Command Prompt and run:
tracert zoom.usOn macOS or Linux:
traceroute zoom.usThis displays each network hop between you and the destination, along with the latency at each step. Look for any single hop that adds a disproportionate amount of delay — for example, a jump from 15 ms to 120 ms at one particular node. If the high-latency hop is within your ISP’s network, that’s useful information to report to their support team. If the first hop already shows high latency, the problem is your local router or modem.
You can’t control internet backbone routing, but identifying where latency accumulates helps you focus your troubleshooting on the right layer — local network, ISP, or destination server.
Choose Closer Meeting Region
Zoom, Microsoft Teams, and Google Meet all operate data centers across multiple geographic regions. By default, most platforms auto-select the nearest server, but this selection isn’t always optimal. If your call routes through a distant data center — due to load balancing, VPN tunneling, or corporate routing policies — latency increases proportionally with physical distance.
In Zoom, account administrators can select preferred data center regions under the admin settings. Individual users on paid plans can verify which data center their call connects to by checking the connection statistics during a meeting (click the shield icon or go to Settings > Statistics). If calls consistently route through a region far from your location, adjusting this setting or disabling VPN during calls can cut latency significantly.
For Google Meet and Teams, the server selection is largely automatic, but using a VPN with a distant exit node is a common cause of unnecessary latency. If you’re required to use a VPN for work, try split tunneling — routing only corporate traffic through the VPN while letting video call traffic take the direct path.
Reduce Jitter and Packet Loss
If your diagnostics showed high jitter or any percentage of packet loss, these fixes address the most frequent root causes. Jitter and loss often originate from the local network — specifically Wi-Fi contention and router-level traffic management — which means they’re usually within your control to fix.
Change Wi-Fi Channel
Wi-Fi congestion is the leading cause of jitter and intermittent packet loss on home networks. Every Wi-Fi router broadcasts on a specific channel, and in dense environments like apartment buildings, multiple routers often compete on the same channel. This creates contention, retransmissions, and unpredictable packet timing — all of which translate directly to jitter during a video call.
On the 2.4 GHz band, only three channels are non-overlapping: 1, 6, and 11. If your router is set to auto-select and lands on a congested channel, switching manually to the least crowded option can make a measurable difference. Use a Wi-Fi analyzer app on your phone — such as WiFi Analyzer on Android or the built-in wireless diagnostics on macOS — to scan which channels neighboring networks occupy, then log into your router’s admin panel and set your channel manually.
Better yet, if your router supports 5 GHz, move your video call device to that band. The 5 GHz band offers significantly more non-overlapping channels, typically has far fewer competing networks, and handles real-time traffic with much less jitter. The tradeoff is reduced range and weaker wall penetration, so your device should be reasonably close to the router.
Enable QoS for Video Traffic
Quality of Service (QoS) is a router feature that prioritizes certain types of traffic over others. When enabled and configured correctly, QoS ensures that video call packets are processed and forwarded before bulk download or upload traffic — even when the network is busy.
Most modern routers include QoS settings in their admin interface, though the exact location and options vary by manufacturer. Look for options to prioritize traffic by application type (voice/video), by device (your work computer’s IP or MAC address), or by port number. Zoom primarily uses UDP ports 8801–8810, and Microsoft Teams uses UDP ports 3478–3481. Prioritizing traffic on these ports gives your call data preferential treatment through the router’s queue.
Without QoS, all traffic is treated equally. A large file upload from another device on your network can saturate your upload bandwidth, causing video call packets to wait in line — resulting in jitter spikes and dropped frames. QoS prevents this by reserving bandwidth and queue priority for time-sensitive streams.
Update Router Firmware
Outdated router firmware is an overlooked cause of packet loss and inconsistent performance. Router manufacturers regularly release firmware updates that fix bugs in packet handling, improve Wi-Fi driver stability, and patch memory leaks that cause routers to degrade over time between reboots.
Log into your router’s admin panel — typically accessed at 192.168.1.1 or 192.168.0.1 in a browser — and check the firmware section. Compare your installed version against the latest version available on the manufacturer’s support page. If an update is available, apply it during a maintenance window when no one is on a call.
For ISP-provided routers, firmware updates are sometimes managed remotely by the ISP. In that case, contact their support to confirm your device is running the latest version. If your ISP router is several years old and no longer receives updates, replacing it with a current-generation router that supports Wi-Fi 6 and proper QoS can resolve persistent jitter and loss issues that no amount of configuration will fix on aging hardware.
Eliminate Bufferbloat During Calls
Bufferbloat is arguably the most underdiagnosed cause of video call lag on fast internet connections. As covered earlier, it inflates latency under load — meaning your connection feels fine when idle but degrades severely the moment other network activity begins. If your diagnostic ping tests showed low latency at rest but massive spikes during downloads or uploads, bufferbloat is almost certainly the culprit. Fixing it requires changes at the router level.
Enable QoS or SQM on Router
The most effective solution for bufferbloat is Smart Queue Management (SQM), also known as Active Queue Management (AQM). SQM algorithms — such as fq_codel or CAKE — intelligently manage your router’s packet queues to prevent them from growing excessively large. Instead of holding hundreds of packets in a bloated buffer, SQM keeps queues short, drops excess packets early when congestion begins, and ensures real-time traffic like video calls doesn’t get buried behind bulk transfers.
Not all routers support SQM natively. Higher-end consumer routers from brands like ASUS, Netgear, and TP-Link often include it under their QoS settings, sometimes labeled as “Adaptive QoS” or “Smart Queue.” If your router runs open-source firmware like OpenWrt, SQM is available as a dedicated package with granular control over queue disciplines and bandwidth limits.
To configure SQM properly, you need to set your upload and download bandwidth limits to approximately 85–90% of your actual measured speeds. This deliberate reduction gives the SQM algorithm room to manage the queue before your ISP’s modem starts buffering — effectively transferring queue control from your ISP’s oversized buffer to your router’s intelligently managed one.
Limit Bandwidth Slightly
Even without SQM, manually limiting your connection’s throughput slightly below its maximum capacity can reduce bufferbloat significantly. This works because bufferbloat occurs when traffic exceeds your link’s capacity and packets pile up in buffers. By capping throughput just below that ceiling, you prevent the queue from forming in the first place.
Most routers allow you to set bandwidth limits in the QoS or traffic management section. Set your upload and download caps to about 85% of your speed test results. For example, if your connection delivers 100 Mbps down and 10 Mbps up, set limits of 85 Mbps down and 8.5 Mbps up. This small sacrifice in peak throughput can reduce latency under load from 300+ ms back to under 30 ms — a tradeoff that makes an enormous difference for video call quality while being barely noticeable for general browsing and streaming.
Test Bufferbloat Before Calls
Before and after applying fixes, measure your bufferbloat to confirm the improvement. The most widely used tool for this is the Waveform Bufferbloat Test, accessible through a standard web browser. It runs a speed test while simultaneously measuring latency, giving you a bufferbloat grade from A+ (no bloat) to F (severe bloat).
Run the test once before any changes to establish a baseline. Then apply your SQM or bandwidth limit settings and test again. You should see your latency-under-load drop dramatically while throughput remains close to your set limits. A grade of A or B means bufferbloat is no longer a factor in your video call performance. If you still score C or below after adjustments, try lowering your bandwidth caps further in 5% increments until the latency under load stabilizes below 30 ms.
Browser and App-Specific Fixes
Not every video call issue originates at the network layer. The application environment — what software is running, how the call client operates, and what resources are available on your device — can introduce lag, freezing, and audio issues that mimic network problems. Once you’ve addressed latency, jitter, packet loss, and bufferbloat, these application-level checks handle the remaining common causes.
Close Background Bandwidth Apps
Applications running in the background can consume bandwidth, CPU cycles, and memory — all of which compete with your video call. Cloud sync services like OneDrive, Google Drive, and Dropbox are frequent offenders. They often upload large files silently, saturating your upload bandwidth without any visible indication. Since video calls depend heavily on consistent upload speed for sending your audio and video to other participants, even a brief upload spike from a sync service can cause your outgoing stream to stutter or freeze.
Before joining a call, pause or quit cloud sync applications. On Windows, check the system tray for active sync icons. On macOS, check the menu bar. Also close any active streaming tabs — a YouTube or Twitch stream running in another tab consumes both bandwidth and CPU resources that your call client needs. Software update services, torrent clients, and large file transfers should all be paused during important calls.
Task Manager on Windows or Activity Monitor on macOS can reveal which processes are consuming network bandwidth in real time. Sort by network usage to identify any unexpected consumers before your call begins.
Use Desktop App Instead of Browser
Running Zoom, Teams, or Google Meet in a web browser adds overhead that the dedicated desktop application avoids. Browser-based video calls must operate within the browser’s sandbox, competing with other tabs for memory, CPU time, and GPU access. They also rely on WebRTC for media handling, which — while capable — is generally less optimized than the native media engines built into dedicated desktop clients.
The desktop versions of Zoom and Microsoft Teams use optimized codecs, have direct access to hardware acceleration, and manage their own network sockets without browser mediation. Users frequently report measurable improvement in call quality simply by switching from a browser tab to the installed application — particularly on older or lower-powered machines where resource contention is more pronounced.
If you must use a browser, Chrome and Edge generally offer the best WebRTC performance. Ensure you’re running only essential tabs during the call, and avoid Firefox for video calls if you experience persistent quality issues, as its WebRTC implementation has historically lagged behind Chromium-based browsers in optimization.
Clear Cache and Disable Extensions
Browser extensions run JavaScript on every page load, including video call tabs. Ad blockers, VPN extensions, privacy tools, and script managers all intercept and process network requests — adding latency and CPU load to your call. Some extensions actively interfere with WebRTC connections, causing intermittent freezing or failed media streams.
Before a browser-based call, try disabling all extensions temporarily. In Chrome, navigate to chrome://extensions/ and toggle off non-essential extensions. If call quality improves, re-enable extensions one at a time to identify the specific offender. VPN browser extensions are particularly problematic because they route all traffic — including your media stream — through an additional proxy layer, adding latency and often introducing packet loss.
Clearing your browser cache and cookies can also help if the call client’s web interface has accumulated corrupted or outdated cached assets. This is especially relevant for Google Meet, which runs entirely in the browser and depends on cached application code functioning correctly.
Final Video Call Troubleshooting Checklist
Use this checklist as a quick reference before or during any video call that experiences lag, freezing, or audio issues. Each item maps directly to the diagnostic steps and fixes covered throughout this guide.
- Run a continuous ping test during the call. Watch for latency spikes above 50 ms or any packet loss.
- Some Windows systems may prefer IPv6 when resolving hostnames instead of IPv4, which can affect certain ping diagnostics. See our guide on ping returns IPv6 instead of IPv4 in Windows 11.
- Test jitter using a UDP-capable diagnostic tool. Jitter consistently above 30 ms will degrade call quality.
- Check for bufferbloat using a latency-under-load test. A grade of C or worse means your router’s buffers are inflating latency.
- Switch to a wired Ethernet connection if currently on Wi-Fi. This eliminates the most common source of jitter and latency spikes.
- Move to 5 GHz Wi-Fi if a wired connection isn’t possible. Avoid the congested 2.4 GHz band during calls.
- Pause cloud sync services and background downloads before joining a call.
- Enable SQM or QoS on your router to prioritize real-time traffic over bulk transfers.
- Set router bandwidth limits to 85–90% of your measured speed to prevent bufferbloat from forming.
- Use the desktop app instead of a browser for Zoom, Teams, or Google Meet.
- Disable browser extensions if using a web-based call client.
- Update router firmware to the latest version available from the manufacturer.
- Check your upload speed specifically — video calls require consistent upload bandwidth, and upload is often the bottleneck on asymmetric connections like cable internet.
- Run traceroute to the call server to identify high-latency hops within your ISP’s network.
If you’ve completed every item on this list and call quality remains poor, the issue likely resides outside your local network — either within your ISP’s infrastructure or on the path between your ISP and the call platform’s data centers. At that point, contacting your ISP with your diagnostic data — ping logs, traceroute output, and bufferbloat test results — gives their support team actionable information instead of a vague complaint about slow video calls.
FAQ – Common Questions & Answers
What causes video call lag despite having a high-speed internet connection?
Because video calls depend on latency, jitter, and packet loss — not raw download speed. A speed test measures bulk throughput using TCP, while video calls stream real-time data over UDP. You can have 200 Mbps of bandwidth and still experience terrible call quality if your latency is high, your packets arrive at inconsistent intervals, or a percentage of them never arrive at all. Once you meet the minimum bandwidth requirement of 2–4 Mbps, additional speed provides zero benefit for call quality.
What causes Zoom or Teams to freeze with good speed?
The most common causes are packet loss and bufferbloat. Packet loss creates visible freezing because lost video frames cannot be retransmitted in time for real-time playback. Bufferbloat causes sudden latency spikes when other devices on your network use bandwidth simultaneously, making the call platform drop frames or reduce quality to compensate. Wi-Fi interference and congested upload bandwidth are also frequent contributors.
Is high latency the main reason for call lag?
High latency is one of the primary reasons, but not the only one. Latency above 150 ms creates noticeable conversational delay — participants talk over each other and responses feel sluggish. However, jitter and packet loss can cause worse symptoms like audio cutting out and video freezing even when average latency is acceptable. All three metrics need to be within acceptable ranges for smooth call performance.
How do I test jitter during a video call?
Run a continuous ping test alongside your call and observe the variation between individual ping times. A sequence that reads 12 ms, 14 ms, 11 ms, 15 ms shows low jitter. A sequence that reads 10 ms, 85 ms, 12 ms, 140 ms, 9 ms shows dangerously high jitter. For a precise jitter measurement in milliseconds, use a dedicated network quality tool that tests with UDP traffic patterns, as these more accurately simulate real-time call conditions than ICMP ping alone.
Does packet loss affect video call quality?
Yes — significantly. Even 1% packet loss causes noticeable audio glitches and video artifacts. At 2–3%, calls become frustrating with frequent freezing and garbled audio. At 5% or higher, calls are essentially unusable. Unlike file downloads where lost packets are retransmitted automatically via TCP, video call media streams use UDP with no retransmission, so every lost packet results in a permanent gap in the audio or video stream.
Can router bufferbloat cause call stuttering?
Absolutely. Bufferbloat is one of the most common causes of video call stuttering on connections that otherwise test as fast. When your router’s buffers fill up during heavy network usage, latency can spike from 15 ms to 500 ms or more within seconds. This causes the call platform to buffer, skip frames, and reduce quality. Enabling SQM on your router and limiting bandwidth to 85–90% of your connection’s capacity are the most effective fixes.
Why does Wi-Fi make video calls worse than wired?
Wi-Fi introduces three problems that Ethernet avoids entirely. First, Wi-Fi is a shared medium — your device must wait its turn to transmit, adding variable latency. Second, radio interference from walls, microwaves, Bluetooth devices, and neighboring networks causes retransmissions and packet loss. Third, Wi-Fi signal strength fluctuates constantly, meaning your effective connection quality can change from one second to the next. Ethernet provides a dedicated, interference-free link with consistent sub-millisecond local latency — exactly what real-time communication requires.
How can I reduce lag in Google Meet or Zoom?
Start with the highest-impact fixes first. Connect via Ethernet instead of Wi-Fi. Enable SQM or QoS on your router to prevent bufferbloat. Pause all background sync services and downloads before joining. Use the dedicated desktop application rather than a browser tab. If latency remains high after these changes, run a traceroute to identify where delay accumulates and check whether a VPN or corporate routing policy is adding unnecessary hops. If all local fixes are exhausted and problems persist, contact your ISP with your ping logs and bufferbloat test results — the issue may be within their network infrastructure and require intervention on their end.
Video call lag on a fast internet connection is almost never a bandwidth problem. It’s a network quality problem — caused by latency, jitter, packet loss, or bufferbloat that standard speed tests don’t reveal. The diagnostic steps and fixes in this guide address every layer where these issues originate, from your router’s queue management to your application environment.
If you’ve worked through the checklist — switched to wired, enabled SQM, eliminated background bandwidth consumers, and confirmed acceptable latency, jitter, and packet loss — and calls still degrade, the remaining cause is almost certainly upstream from your network. Contact your ISP with specific data: your ping logs showing latency spikes, traceroute output identifying the problematic hop, and bufferbloat test grades. This gives their engineering team the evidence needed to investigate and resolve issues within their infrastructure rather than defaulting to the usual script of restarting your modem.