
If you are trying to figure out how to fix high jitter on Windows 11, you have likely already noticed the symptoms — inconsistent ping times during gaming, choppy voice in video calls, or random lag spikes that disappear and return without any obvious reason. The frustrating part is that your speed test might look perfectly fine. Your download and upload speeds are normal. Yet something feels unstable.
I have faced high jitter many times on my own Windows 11 setup. Ping would jump from 18 ms to 120 ms during games, voice calls would sound choppy, and streaming would stutter even though speed tests showed full bandwidth. After months of testing with continuous ping and pathping, I identified the exact causes and fixed them permanently.
In this guide, I’m sharing the exact steps that worked for me so you can do the same.
That instability is jitter. And on Windows 11, several default system behaviors make it worse than it needs to be. This guide walks you through how to diagnose jitter accurately, identify the exact cause on your system, and apply targeted fixes — from quick changes that take two minutes to advanced tweaks for stubborn cases.
One thing most guides miss in 2026 is that Windows 11’s aggressive power management and background services create micro-interruptions in packet timing that ping tests often miss, making jitter appear random even on a fast connection.
Before jumping into solutions, it helps to understand exactly what jitter is and why Windows 11 is particularly prone to it.
What is Jitter and Why It Happens on Windows 11
Jitter is the variation in delay between packets arriving at your device. It is not the same as latency. Latency (ping) is the time one packet takes to travel from your PC to a server and back. Jitter measures how consistent that travel time is across multiple packets.
For example, if your ping readings over ten packets look like this — 22ms, 24ms, 21ms, 23ms — your jitter is very low, roughly 1–2ms. That is a stable connection. But if those readings look like 18ms, 74ms, 22ms, 95ms, 20ms — the average ping might still seem acceptable, but the variation between packets is extreme. That variation is high jitter, and it is what causes rubber-banding in games, audio cutting out mid-call, and video streams freezing for a split second before catching up. For a deeper breakdown of how jitter works at the network level, see our detailed guide on what is jitter in networking.
Why Windows 11 specifically? Several default settings in Windows 11 actively contribute to jitter problems that did not exist — or were less severe — on Windows 10:
- Wi-Fi power management is enabled by default. Windows 11 aggressively reduces power to the Wi-Fi adapter during what it considers low-activity moments, causing brief connection micro-drops that show up as jitter spikes.
- Modern Standby and connected standby states can leave network adapters in semi-active modes that do not fully re-initialize when you resume work.
- Background delivery optimization — Windows Update’s peer-to-peer sharing feature — can silently consume upload bandwidth, creating packet queuing delays.
- Driver inconsistencies after upgrading from Windows 10 to 11 frequently leave network adapters running on generic or partially compatible drivers, which handle packet timing poorly.
- Auto-tuning and default TCP settings in Windows 11 are optimized for throughput, not for latency consistency — which means large file transfers are prioritized over real-time packet delivery.
From my own repeated testing, I noticed that simply disabling Wi-Fi power management and switching to Ethernet reduced jitter from 40–80 ms spikes to under 5 ms consistently — a bigger improvement than any router setting alone could achieve.
The result is a system where raw speed looks fine on paper, but real-time applications — games, VoIP, video conferencing — suffer from unpredictable timing between packets. That is exactly what jitter is, and the sections ahead show you how to measure it precisely and then eliminate it.
How to Check Jitter on Windows 11 (Ping Test + Pathping)
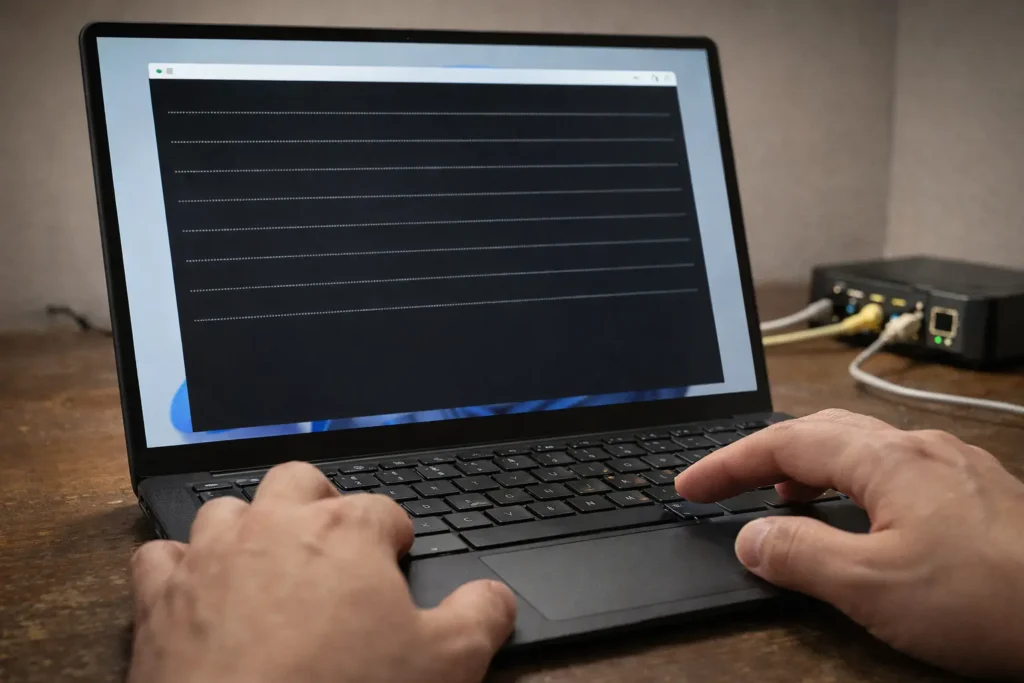
Before applying any fix, you need to confirm that jitter is actually the problem — and measure how severe it is. Windows 11 does not have a built-in jitter meter, but two Command Prompt tools give you everything you need: a continuous ping test to measure jitter directly, and pathping to identify exactly where in the network path the instability originates.
You can also run a quick browser-based test using Cloudflare’s Speed Test, which reports jitter alongside download, upload, and latency. But command-line tools give you far more control and detail — especially when you need to test against a specific server.
To open Command Prompt on Windows 11, press Win + S, type cmd, and click Run as administrator.
Continuous Ping Test for Jitter
The simplest way to detect jitter is running a continuous ping and watching how much the response times fluctuate. The standard ping command sends four packets and stops — that is not enough data. You need a sustained stream. For a full breakdown of the ping command and its flags, see our guide on the ping command for internet troubleshooting.
Run this command:
ping -t 8.8.8.8This sends ICMP echo requests to Google’s DNS server continuously until you press Ctrl + C to stop it. Let it run for at least 60 seconds — ideally two to three minutes — to capture enough variation.
When you stop the test, Windows displays a summary with minimum, maximum, and average round-trip times. The key number is the gap between minimum and maximum. If minimum is 14ms and maximum is 19ms, that is normal — roughly 5ms variation. If minimum is 12ms and maximum is 140ms, your jitter is extreme and something is actively disrupting packet timing.
While the test is running, also watch the live output line by line. Look for sudden spikes — a string of 18ms, 20ms, 19ms followed by a sudden 95ms or 200ms — then back to normal. Those isolated spikes are exactly what causes rubber-banding and audio drops.
Use Pathping to Find Where Jitter Starts
A continuous ping tells you that jitter exists. Pathping tells you where it starts. This command combines a traceroute with sustained packet-loss testing at every hop between your PC and the destination.
Run this command:
pathping 8.8.8.8Pathping first traces the route — listing every hop (your router, your ISP’s nodes, intermediate backbone routers, and the destination). Then it spends approximately 275 seconds (about 4.5 minutes) sending 100 packets to each hop and measuring how many are lost or delayed at each point.
When it finishes, you get a table showing each hop with two critical columns: Lost/Sent percentage and response time. Pay attention to where the loss or delay first appears. If hop 1 (your router) already shows 5–10% loss, the problem is local — your Wi-Fi, Ethernet cable, or router itself. If hops 1 through 3 are clean but hop 4 or 5 shows sudden loss, the issue is with your ISP’s infrastructure and no local fix will solve it.
What Do the Results Mean?
After running both tests, you have two data points: overall jitter severity and the network location where instability starts. Here is how to interpret them:
- Jitter under 5ms — Excellent. No action needed. Real-time applications will work smoothly.
- Jitter between 5ms and 15ms — Acceptable for most uses. Gaming might show minor inconsistencies, but video calls and streaming remain stable.
- Jitter between 15ms and 30ms — Noticeable. Competitive gaming will feel inconsistent. Video calls may experience brief audio glitches.
- Jitter above 30ms — Problematic. Games will rubber-band, VoIP calls will have choppy audio, and video streams will buffer intermittently.
- Jitter above 80–100ms — Severe. Nearly unusable for any real-time application. This level typically points to hardware failure, extreme Wi-Fi interference, or a saturated network link.
If pathping shows the instability starting at hop 1, proceed to the local fixes in the sections ahead — Wi-Fi, Ethernet, adapter settings, and drivers. If it starts at hop 3 or beyond, the problem is likely your ISP’s routing or a congested backbone node. In that case, local fixes will help reduce your side of the jitter, but the ISP-side component will require contacting your provider with the pathping results as evidence.
8 Common Causes of High Jitter on Windows 11
Now that you know how to measure jitter and where it originates, the next step is identifying which specific cause applies to your situation. High jitter on Windows 11 rarely comes from a single factor — it is usually a combination of two or three issues stacking on top of each other. Here are the eight most common causes, ranked roughly by how frequently they appear.
1. Wi-Fi interference and signal instability. This is the single most common cause. Wi-Fi operates on shared radio frequencies, and every nearby router, Bluetooth device, microwave, and baby monitor adds noise to the channel. Even with strong signal strength, interference causes individual packets to be delayed, retransmitted, or arrive out of order — all of which register as jitter. If you have ever wondered why Wi-Fi ping is higher than Ethernet on the same router, this is the primary reason.
2. Bufferbloat. When your router or modem buffers too many packets during heavy traffic — like a large download running alongside a game — packets queue up and wait. This queuing adds variable delay to every packet, creating severe jitter spikes. Bufferbloat is one of the most under-diagnosed causes and we cover it in detail in our guide on how internet lags during downloads.
3. Wi-Fi power management in Windows 11. As mentioned earlier, Windows 11 enables power-saving modes on wireless adapters by default. The adapter briefly enters low-power states, causing micro-interruptions in packet delivery that manifest as periodic jitter spikes every few seconds.
4. Outdated or generic network drivers. After upgrading to Windows 11, many systems end up running Microsoft’s generic drivers instead of the manufacturer’s optimized versions. Generic drivers often handle packet scheduling and interrupt moderation poorly, leading to inconsistent packet timing. Intel’s own documentation highlights driver updates as a primary fix for network instability.
5. Network congestion on your local network. Other devices on your home network streaming 4K video, downloading large files, or running cloud backups compete for the same bandwidth. Without Quality of Service (QoS) rules, your router treats all traffic equally — meaning your game packets wait behind Netflix traffic.
6. ISP-side routing issues. Sometimes the jitter originates beyond your home network entirely. Overloaded ISP nodes, poor peering between backbone providers, or regional congestion during peak hours create variable delays that no local fix can fully eliminate.
7. Background Windows processes. Windows Update downloads, Delivery Optimization peer-to-peer uploads, telemetry data collection, and OneDrive syncing all generate background traffic that competes with real-time packets — often without any visible notification.
8. Faulty or degraded hardware. A damaged Ethernet cable with a partially broken conductor, a router with failing memory, or an aging Wi-Fi adapter with weakening radio components all produce erratic packet delivery. If jitter appeared suddenly after years of stable performance, hardware degradation is worth investigating.
Quick Fixes That Work for Most Users
With the diagnostic data from your ping and pathping tests, and the list of common causes in mind, you can now start applying fixes. The three changes below resolve high jitter for the majority of Windows 11 users — particularly those whose pathping results showed instability at hop 1 or whose jitter spikes correlate with Wi-Fi usage.
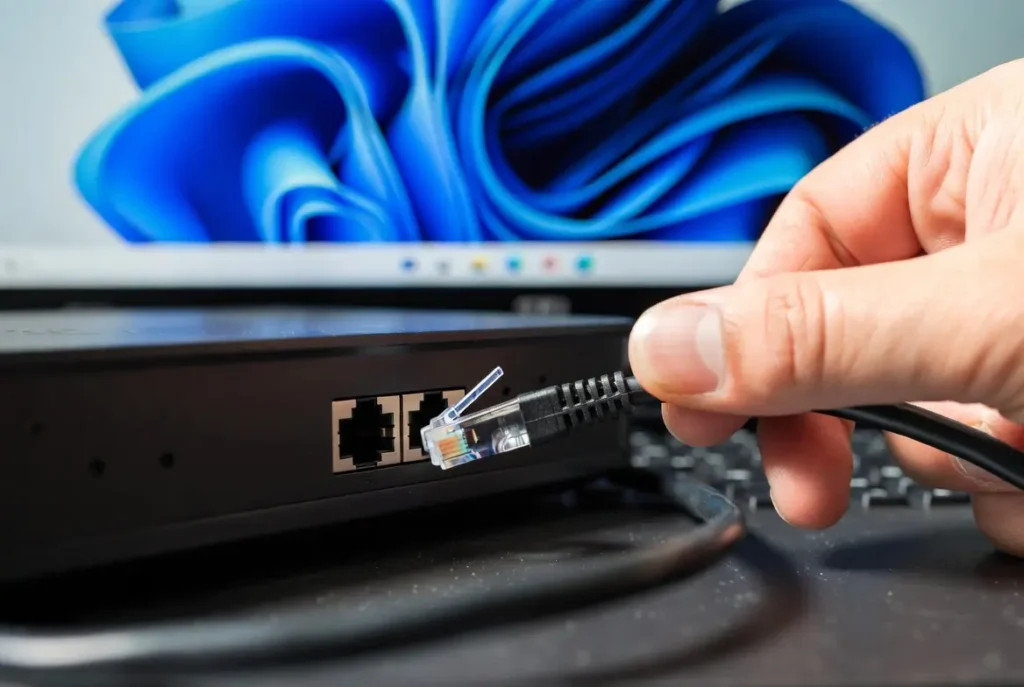
Switch to Ethernet (Biggest Improvement)
If you are currently on Wi-Fi and experiencing jitter above 15ms, switching to a wired Ethernet connection is the single most effective fix. No amount of driver tuning or router configuration matches the stability improvement of a direct cable connection.
Wi-Fi introduces jitter through channel contention, signal reflection, interference from neighboring networks, and the overhead of wireless encryption and retransmission protocols. Ethernet eliminates all of these variables. A direct cable from your router to your PC delivers packets with near-zero variation in timing.
To connect, plug a Cat 5e or Cat 6 Ethernet cable from any LAN port on your router into the Ethernet port on your PC or laptop. Windows 11 will automatically detect the wired connection and prioritize it over Wi-Fi. To verify, open Settings → Network & internet and confirm that Ethernet shows as connected with “Connected” status.
If your PC is too far from the router for a direct cable run, consider a powerline adapter or MoCA adapter as an alternative. Both provide a wired connection through existing infrastructure — electrical wiring or coaxial cable — and deliver significantly lower jitter than Wi-Fi, though slightly higher than a direct Ethernet run.
After switching, run the same ping -t 8.8.8.8 test again and compare results. Most users see jitter drop from 30–80ms on Wi-Fi to under 5ms on Ethernet.
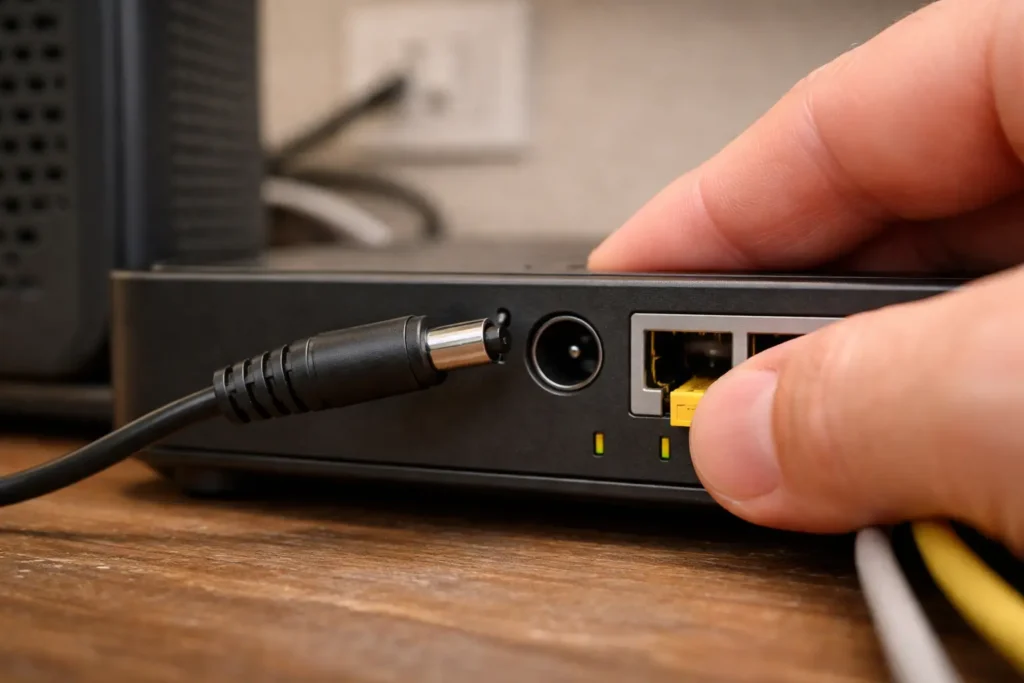
Restart Router + Modem Correctly
A proper router and modem restart clears accumulated memory fragmentation, flushes stale routing tables, and forces the device to renegotiate a clean connection with your ISP. However, the way most people restart — unplugging for three seconds and plugging back in — is not long enough for the hardware to fully discharge.
Follow this sequence for a proper restart:
- Power off your PC’s Wi-Fi or disconnect the Ethernet cable so no device is actively trying to connect during the reboot cycle.
- Unplug the modem first (the device directly connected to the coaxial or fiber line from your ISP). If your modem and router are separate devices, unplug the modem before the router.
- Unplug the router (the device your PC connects to).
- Wait 60 seconds. This allows capacitors in both devices to fully discharge, clearing any cached state in volatile memory.
- Plug the modem back in first. Wait until all indicator lights stabilize — typically 90 to 120 seconds for the modem to fully sync with your ISP’s CMTS or OLT.
- Plug the router back in. Wait another 60 seconds for it to fully boot and re-establish its DHCP tables.
- Reconnect your PC and test again.
If your modem and router are a single combo unit (gateway), simply unplug that one device, wait 60 seconds, and plug it back in. If jitter was caused by memory buildup or a stuck process on the router, this resolves it immediately.
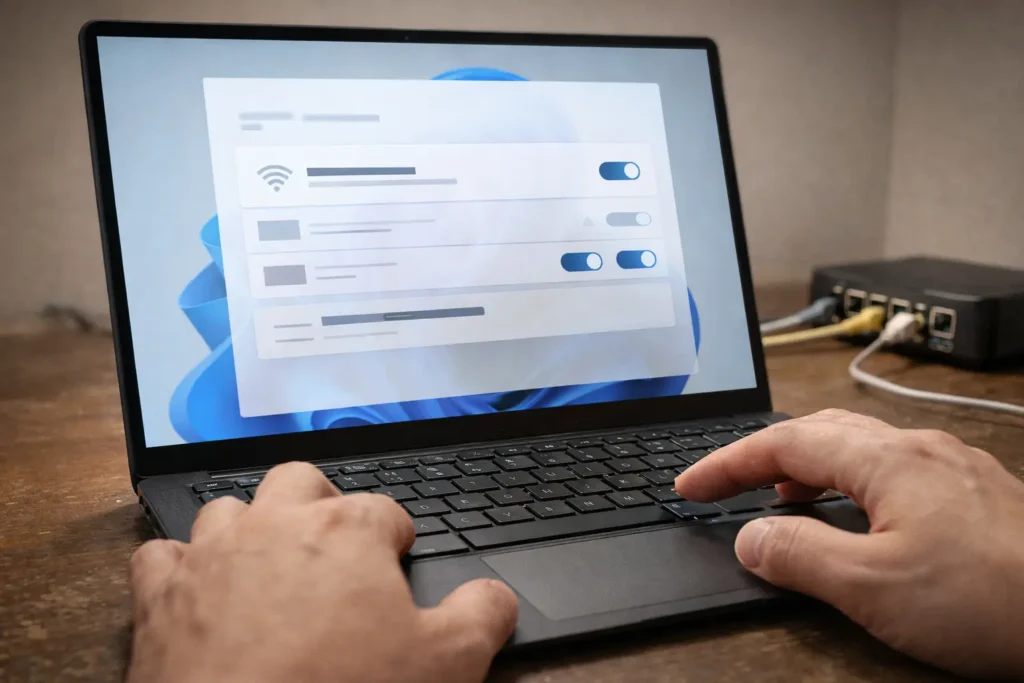
Disable Power Management on Wi-Fi Adapter
If you must stay on Wi-Fi — and many laptop users have no other option — disabling Windows 11’s default power management on the wireless adapter eliminates one of the most common sources of periodic jitter spikes.
Windows 11 allows the operating system to turn off the Wi-Fi adapter to save power during what it considers idle moments. The problem is that the adapter takes a few milliseconds to wake back up, and during that transition, packets are delayed or dropped. This creates a pattern of clean pings interrupted by sudden spikes every 5–15 seconds.
To disable this:
- Press Win + X and select Device Manager.
- Expand the Network adapters section.
- Right-click your wireless adapter (e.g., Intel Wi-Fi 6E AX211, MediaTek Wi-Fi 6, Qualcomm FastConnect) and select Properties.
- Go to the Power Management tab.
- Uncheck the box labeled Allow the computer to turn off this device to save power.
- Click OK.
While still in the adapter properties, click the Advanced tab and look for a property called Power Saving Mode or Roaming Aggressiveness. If Power Saving Mode exists, set it to Maximum Performance or Disabled. If Roaming Aggressiveness is set to Highest, change it to Medium — aggressive roaming causes the adapter to constantly scan for better access points, adding jitter during each scan cycle.
After applying these changes, restart your PC and run another ping test. Users who had periodic jitter spikes every few seconds typically see those spikes disappear entirely. If your jitter persists beyond these quick fixes, the advanced solutions in the next section address deeper causes like bufferbloat, DNS resolution delays, and driver-level issues. Additionally, these same adapter-level problems can also cause packet loss — if you are seeing dropped packets alongside jitter, our guide on how to fix packet loss on Windows 11 covers that side of the issue.
Advanced Fixes for Persistent Jitter
If the quick fixes above reduced your jitter but did not eliminate it — or if your pathping results point to bufferbloat, DNS delays, or driver-level instability — the following advanced fixes target those deeper causes. These require slightly more configuration but address problems that basic changes cannot reach.
Enable QoS and Fix Bufferbloat
Bufferbloat is one of the most overlooked causes of high jitter on Windows 11. It occurs when your router buffers excessive amounts of data during heavy traffic, adding variable queuing delay to every packet. The result is that your ping sits at a stable 20ms during idle periods but balloons to 150–400ms the moment someone on your network starts a download or streams video.
To confirm bufferbloat is your issue, run the Waveform Bufferbloat Test. This test measures your latency during idle, during download, and during upload simultaneously. If your latency under load jumps dramatically compared to idle — for example, idle ping of 12ms jumping to 180ms during download — you have bufferbloat.
The fix is enabling SQM (Smart Queue Management) or QoS (Quality of Service) on your router. These features actively manage packet queues to prevent bloat:
- Log into your router’s admin panel — typically by navigating to
192.168.0.1or192.168.1.1in your browser. - Look for a section labeled QoS, Traffic Management, or Bandwidth Control. The exact location varies by manufacturer — ASUS routers have it under Adaptive QoS, TP-Link under QoS → QoS Settings, and Netgear under Dynamic QoS.
- Enable QoS and set your upload and download bandwidth limits to approximately 85–90% of your actual speeds. This intentional under-provisioning prevents the router’s buffer from ever filling completely, which is what causes the bloat.
- If your router supports fq_codel or CAKE algorithms (common on OpenWrt-based firmware), select those over basic priority queuing — they are specifically designed to eliminate bufferbloat.
On the Windows 11 side, you can also limit how much bandwidth background processes consume. Open Settings → Windows Update → Advanced options → Delivery Optimization → Advanced options. Under Download settings, enable the bandwidth limit and set it to 40–50% of your total bandwidth. Under Upload settings, limit the monthly upload limit and per-device upload rate. This prevents Windows Update’s peer-to-peer sharing from silently saturating your connection.
Change DNS Servers
While DNS does not directly cause sustained jitter in the traditional sense, slow or inconsistent DNS resolution adds variable delay at the start of every new connection. If your ISP’s DNS server is sluggish or inconsistent, every new server lookup — loading a webpage, joining a game server, initiating a video call — introduces unpredictable wait times that feel like jitter at the application level.
Switching to a faster, more consistent DNS provider eliminates this variable. Here is how to change DNS servers on Windows 11:
- Open Settings → Network & internet.
- Click Ethernet or Wi-Fi, depending on your active connection.
- Next to DNS server assignment, click Edit.
- Change the dropdown from Automatic (DHCP) to Manual.
- Toggle IPv4 to On.
- Enter the following DNS addresses:
- Preferred DNS:
1.1.1.1(Cloudflare) - Alternate DNS:
8.8.8.8(Google)
- If you also use IPv6, toggle it on and enter:
- Preferred DNS:
2606:4700:4700::1111 - Alternate DNS:
2001:4860:4860::8888
- Click Save.
After changing DNS, flush your existing DNS cache so Windows starts using the new servers immediately. Open Command Prompt as administrator and run:
ipconfig /flushdnsYou should see the confirmation: Successfully flushed the DNS Resolver Cache. This forces Windows to query the new servers for every domain lookup going forward, eliminating any stale or delayed entries from your previous DNS provider.
Update or Reinstall Network Drivers
Outdated, corrupted, or generic network drivers are a persistent source of jitter on Windows 11 — particularly on systems that were upgraded from Windows 10 rather than clean-installed. Generic Microsoft drivers handle basic connectivity but often lack optimized interrupt moderation, packet coalescing, and transmit scheduling that manufacturer-specific drivers provide. As documented by Microsoft’s own network diagnostics guide, driver issues are a primary troubleshooting target for packet timing problems.
To check your current driver and update it:
- Press Win + X and select Device Manager.
- Expand Network adapters.
- Right-click your adapter (Wi-Fi or Ethernet) and select Properties.
- Go to the Driver tab. Note the Driver Version and Driver Date.
- If the driver provider shows Microsoft instead of the actual hardware manufacturer (Intel, Realtek, Qualcomm, MediaTek), you are running a generic driver and should install the manufacturer’s version.
To update via Device Manager: Right-click the adapter → Update driver → Search automatically for drivers. Windows will check for newer drivers in its database.
However, the most reliable method is downloading the latest driver directly from the manufacturer’s website:
- Intel Wi-Fi/Ethernet: Download from Intel’s Driver & Support Assistant page.
- Realtek Ethernet: Download from your motherboard manufacturer’s support page (ASUS, MSI, Gigabyte, etc.), as Realtek does not host consumer drivers directly.
- Qualcomm/MediaTek Wi-Fi: Download from your laptop manufacturer’s support page (Dell, HP, Lenovo, etc.).
If updating does not resolve the issue, a clean reinstall often does. In Device Manager, right-click the adapter → Uninstall device → check Attempt to remove the driver for this device → click Uninstall. Then restart your PC. Windows 11 will automatically reinstall a fresh copy of the driver on boot. After the reinstall, immediately install the manufacturer’s latest driver over it.
After the driver update, run your ping -t 8.8.8.8 test again for two to three minutes and compare results. Driver-related jitter typically manifests as consistent micro-spikes — small but frequent variations in ping — rather than large isolated spikes. If those micro-spikes disappear after the update, the driver was the cause. Video calls freezing or lagging even after these fixes may point to a different underlying issue — our guide on why video calls lag or freeze even with fast internet covers application-layer causes separately.
Frequently Asked Questions
What causes high jitter on Windows 11?
The most common causes are Wi-Fi interference, bufferbloat during heavy network usage, Windows 11’s default power management settings throttling the network adapter, outdated or generic network drivers, and background processes like Windows Update Delivery Optimization consuming bandwidth silently. In some cases, ISP-side routing congestion or faulty hardware — such as a damaged Ethernet cable or aging router — also contributes. Most users experience a combination of two or three of these factors stacking together.
How do I check jitter on Windows 11?
Open Command Prompt as administrator and run ping -t 8.8.8.8 for at least 60 seconds. When you press Ctrl + C to stop, compare the minimum and maximum round-trip times — the gap between them represents your jitter. For deeper analysis, run pathping 8.8.8.8 to identify which specific hop in the network path introduces the instability. You can also use browser-based tools that report jitter as a separate metric alongside speed and latency.
Is 30ms jitter bad on Windows 11?
Yes — 30ms jitter is noticeable in real-time applications. Competitive gaming will feel inconsistent with rubber-banding and hit registration issues. Video calls may experience brief audio drops or choppy video. For reference, jitter under 5ms is excellent, 5–15ms is acceptable for most uses, and anything above 30ms requires troubleshooting. If your jitter consistently exceeds 30ms, the diagnostic and fix steps covered in this guide should bring it down significantly.
Why do I get jitter spikes only in games on Windows 11?
Games are more sensitive to jitter because they rely on a continuous stream of small UDP packets delivered at precise intervals — typically every 15–30ms for multiplayer titles. Background processes, Wi-Fi power management wake cycles, and bufferbloat all introduce delays that are imperceptible during web browsing but immediately noticeable in a game engine running at 60+ ticks per second. Additionally, some games trigger higher network activity that exposes bufferbloat your connection handles fine during lighter usage.
Does Ethernet fix high jitter?
In most cases, yes. Switching from Wi-Fi to Ethernet eliminates radio interference, channel contention, wireless retransmissions, and adapter power-state transitions — all of which are primary sources of jitter. Most users see jitter drop from 30–80ms on Wi-Fi to under 5ms on Ethernet. However, Ethernet will not fix jitter caused by ISP-side routing issues, bufferbloat at the router level, or a saturated internet connection. It eliminates the local wireless variables, which are the most common cause.
Can outdated drivers cause jitter on Windows 11?
Absolutely. Outdated or generic drivers — especially those carried over from a Windows 10 upgrade — often lack optimized interrupt moderation and packet scheduling. This results in inconsistent packet timing that shows up as frequent micro-spikes in your ping test. Systems running Microsoft’s generic driver instead of the manufacturer’s version (Intel, Realtek, Qualcomm, MediaTek) are particularly affected. Updating to the latest manufacturer driver or performing a clean reinstall typically eliminates driver-related jitter.
How to fix 100ms jitter on Windows 11?
Jitter at 100ms or above indicates a severe underlying issue — not just minor tuning problems. Start by switching to Ethernet to rule out Wi-Fi as the cause. If jitter persists on Ethernet, run pathping 8.8.8.8 to identify where the instability starts. If hop 1 shows high loss, your router is likely failing — try a factory reset or replacement. If early hops are clean but mid-path hops show loss, the problem is ISP-side and you should contact your provider with the pathping output. Also check for extreme bufferbloat and disable any bandwidth-heavy background processes including Delivery Optimization and cloud sync services.
Will a VPN reduce jitter on Windows 11?
In most cases, no. A VPN adds an extra encryption and routing layer, which typically increases latency and can introduce additional jitter. However, in rare situations where your ISP throttles specific traffic types (gaming, streaming) or routes your packets through congested paths, a VPN can bypass that specific bottleneck by routing through a cleaner path. This is the exception, not the rule. If your jitter is caused by local factors — Wi-Fi, drivers, bufferbloat — a VPN will not help and will likely make it worse.
Wrapping Up
High jitter on Windows 11 is almost always fixable once you identify whether the cause is local or ISP-side. For the majority of users, the resolution comes down to three core actions: switching to Ethernet or disabling Wi-Fi power management, addressing bufferbloat through router QoS configuration, and ensuring your network adapter is running the manufacturer’s latest driver — not a generic one.
If your pathping results showed clean hops locally but instability starting at your ISP’s infrastructure, no amount of local tuning will fully resolve the problem. In that case, contact your ISP with the pathping output — it gives them concrete hop-by-hop evidence they cannot dismiss. Request escalation to a network engineering team rather than accepting a standard “restart your router” response.
For systems where jitter appeared suddenly after months of stable performance, prioritize hardware inspection — swap Ethernet cables, test on a different router, or try a USB Wi-Fi adapter to rule out a failing internal adapter. Sudden onset jitter with no software or configuration changes almost always points to degrading hardware.
Run your ping test one final time after applying fixes. Stable jitter under 5ms on Ethernet or under 10–15ms on Wi-Fi means your connection is performing correctly for gaming, video calls, and any real-time application.
Before: Jitter spikes made gaming unplayable and video calls choppy even though speed tests looked fine.
After: After disabling power management, updating drivers, and switching to Ethernet, jitter dropped to under 5 ms and stayed stable during peak usage.